Quote module is one of the most important modules in Osmos. From here, you can create, update, and send quotes, as well as convert them into invoices or sales orders.
In this guide, you’ll learn how to use all the features in the Quote module.
Open a Quote
1. Go to the left-hand menu and select the "Quotes" module
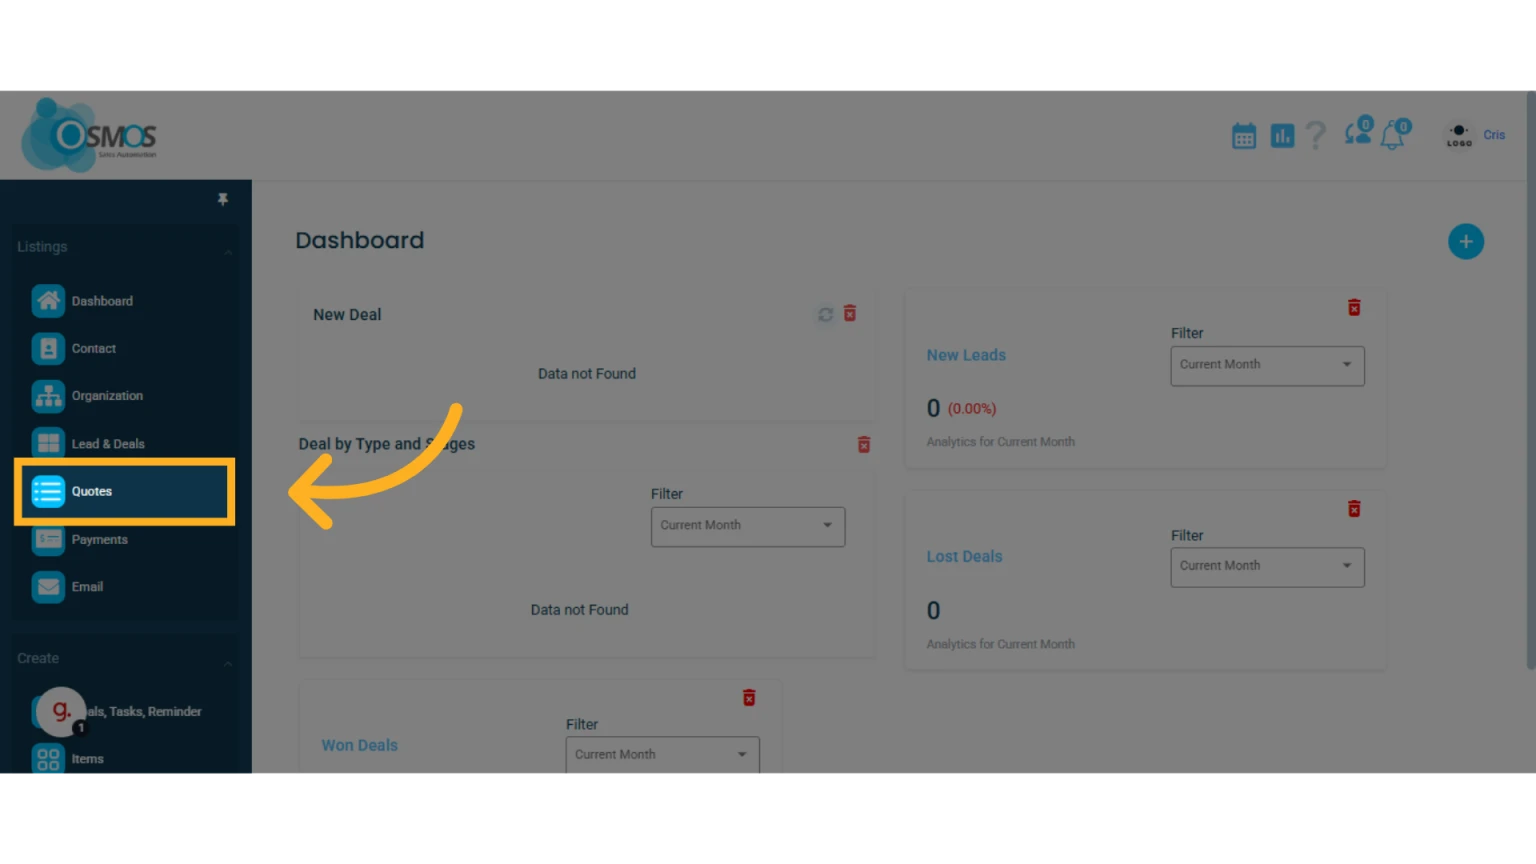
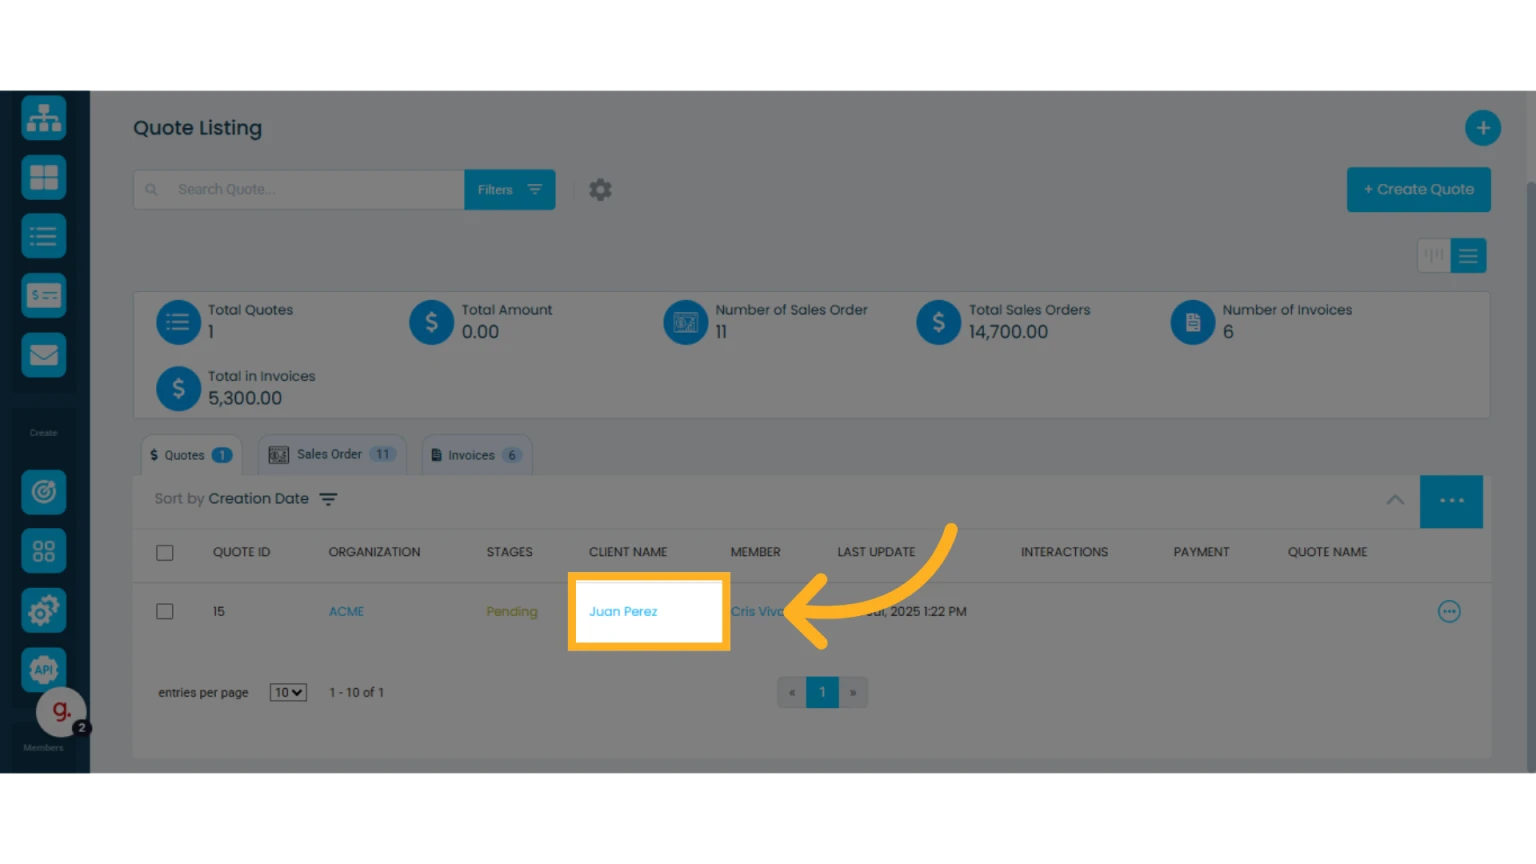
2. Click on a quote to open it
If you don’t have any quotes yet, you’ll need to create one first.
Learn how to create a quote.
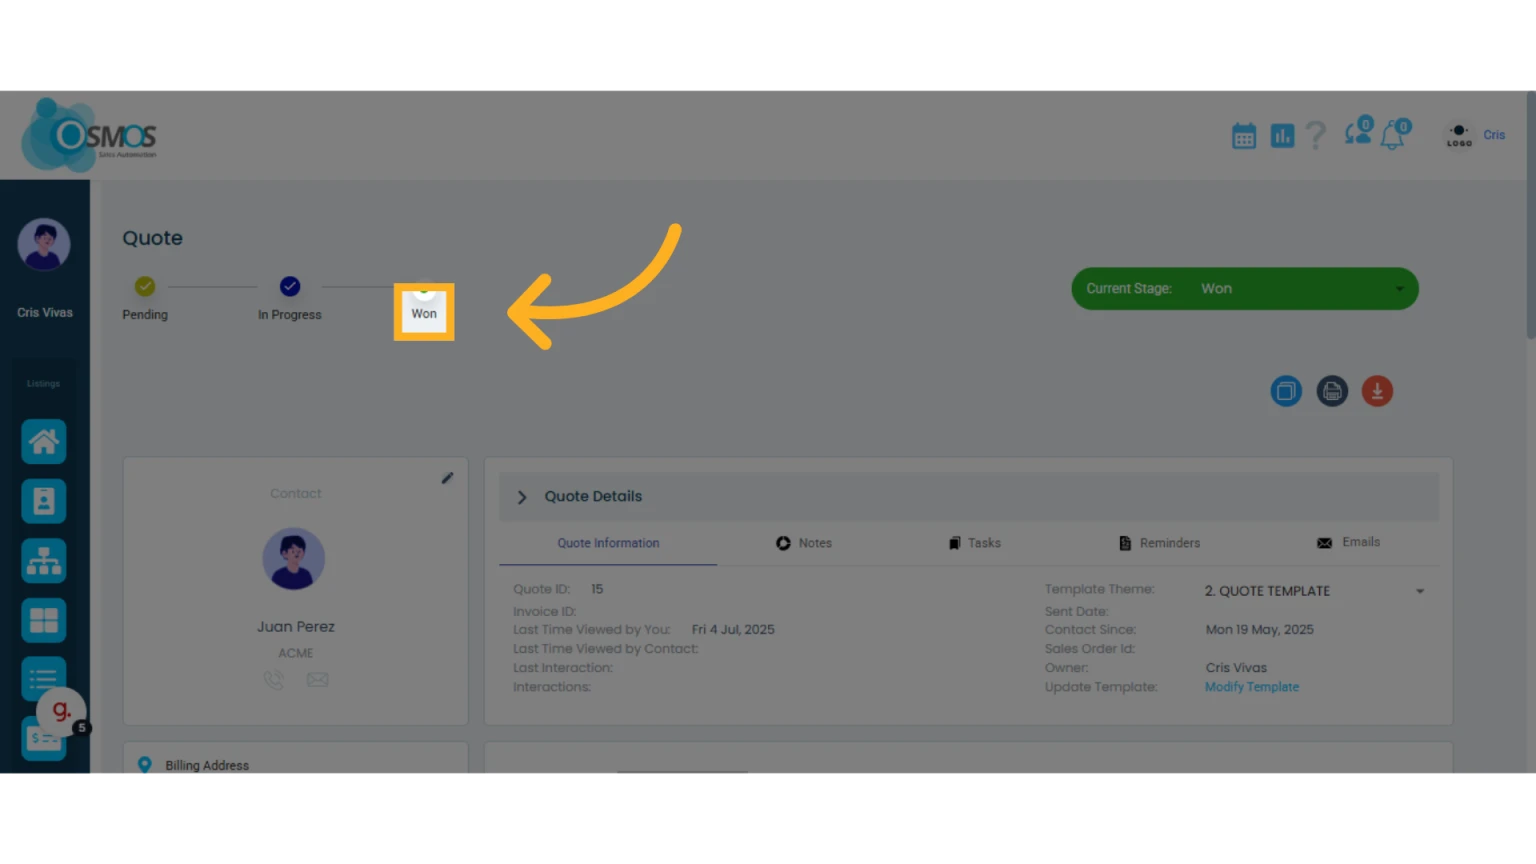
View or Change the Quote Stage
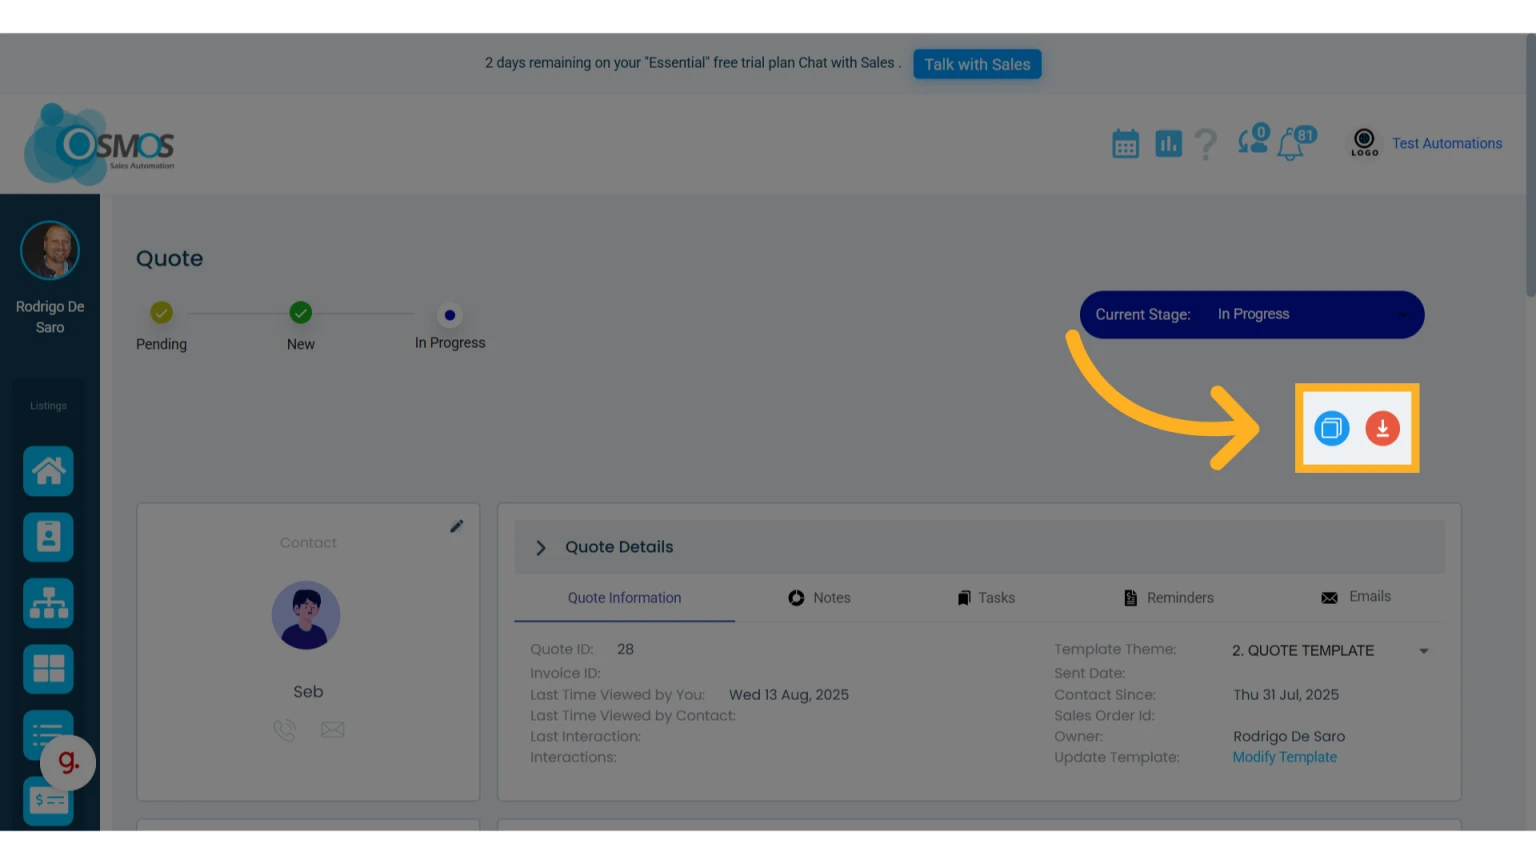
In the top-left and top-right corners, you can see the current stage of the quote.
To modify the quote stage, open the dropdown menu in the top-right corner, next to the current stage.
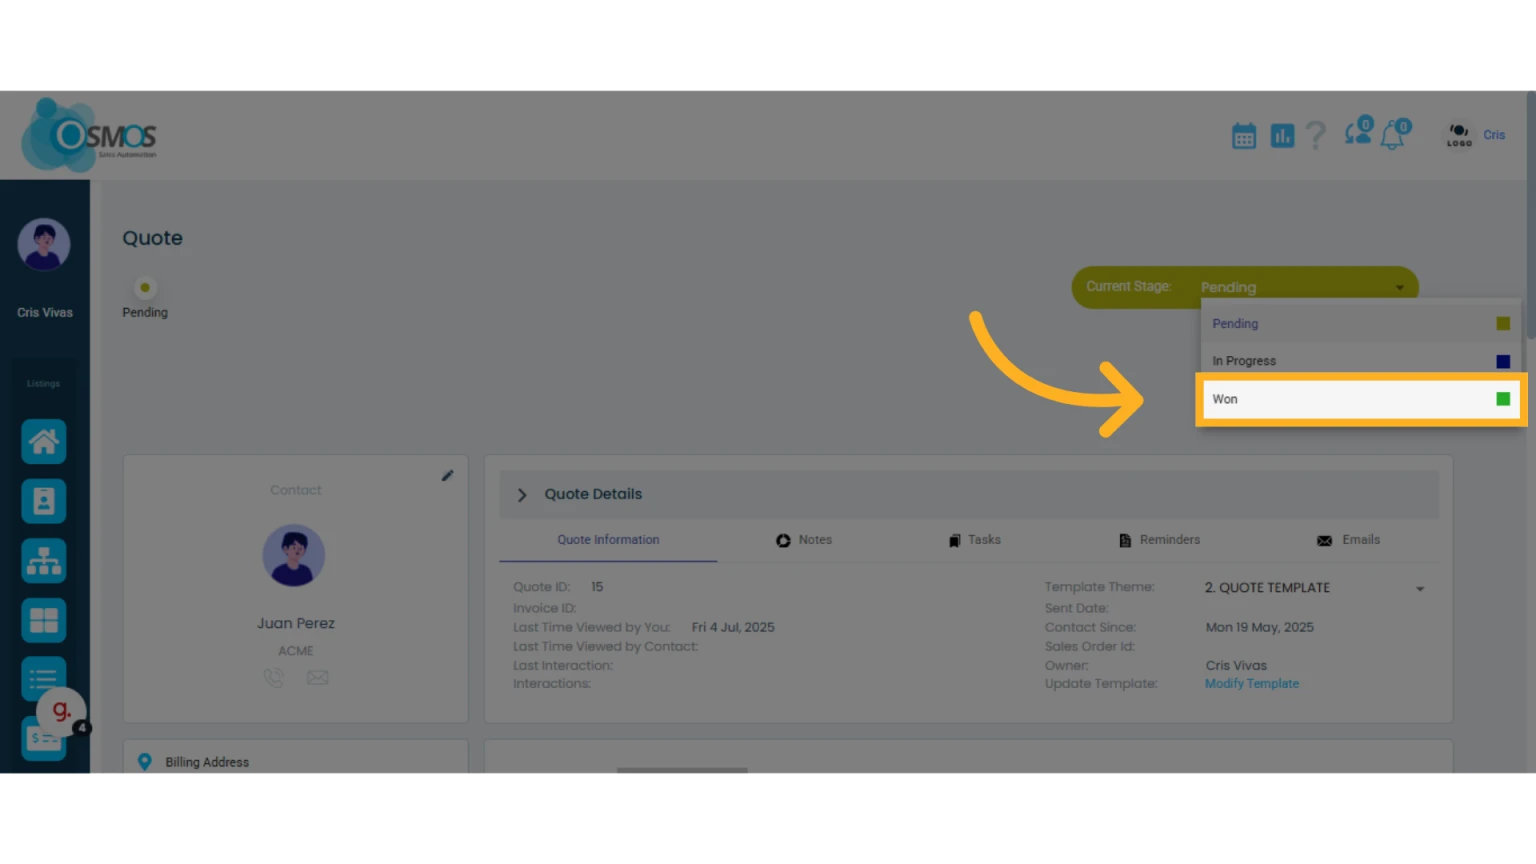
The stage will update and be reflected in the stage flow on the left side.
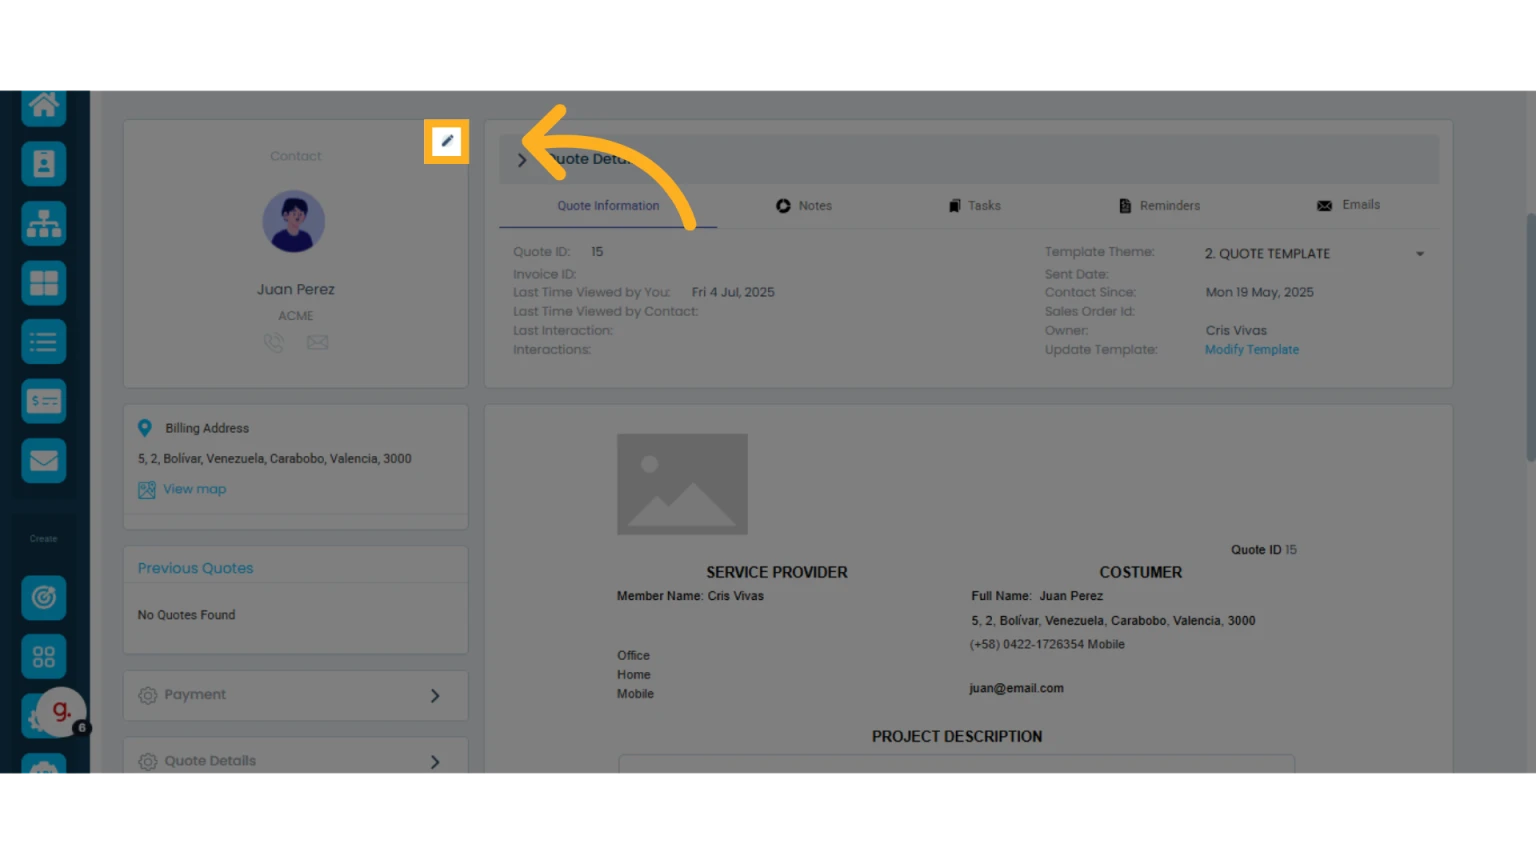
Modify Contact Information
Click the pencil icon to modify the contact’s information.
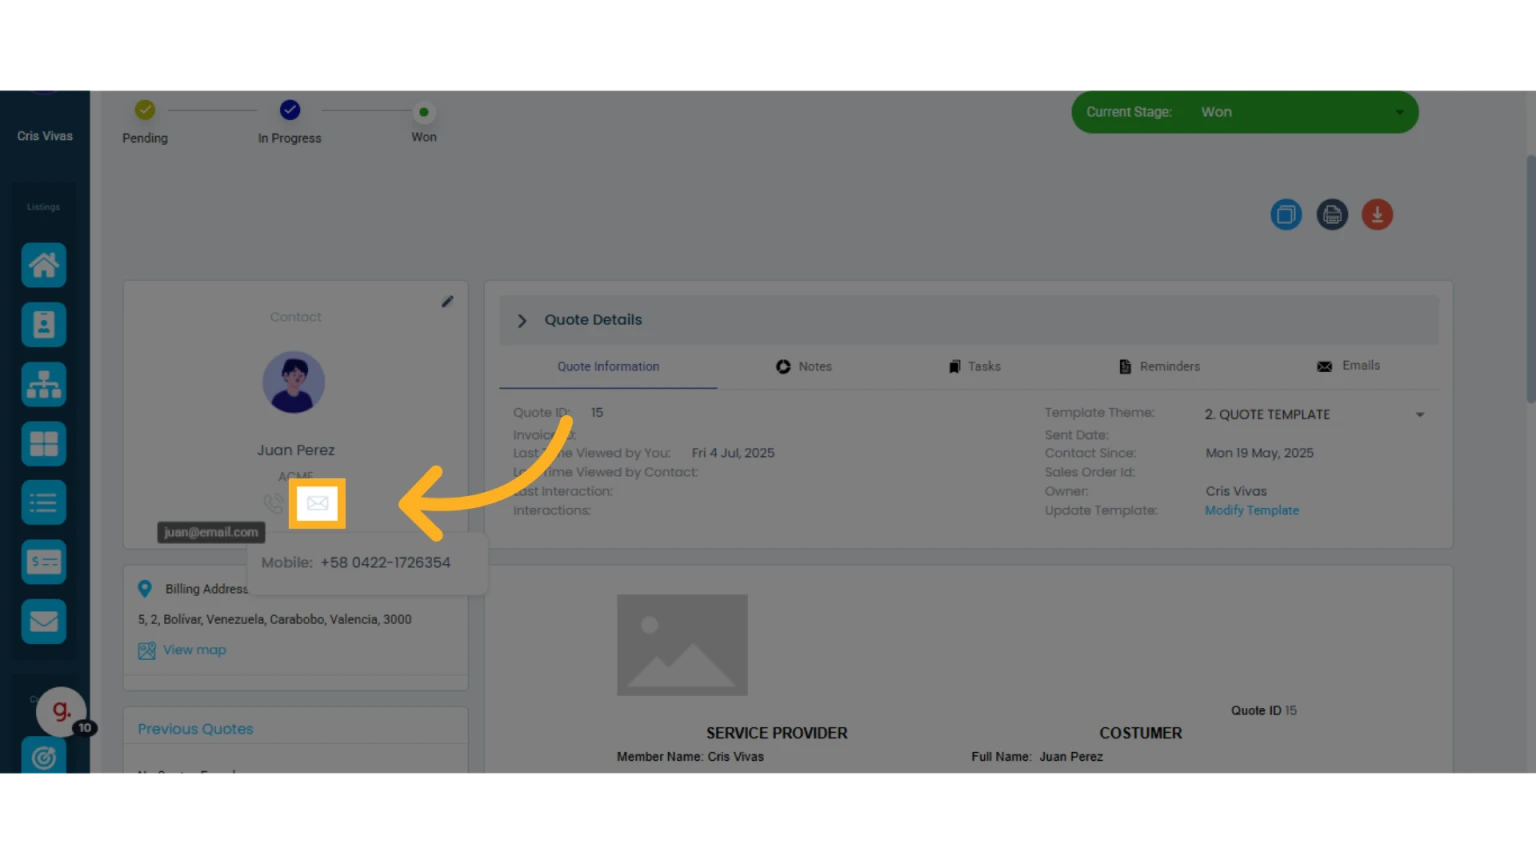
To view phone numbers, click the phone icon.

To view the email address, hover your mouse over the envelope icon. To send an email, click the email icon.
NOTE: You can only send emails if you’ve already set up your email account in Osmos.
Learn how to set up your email.
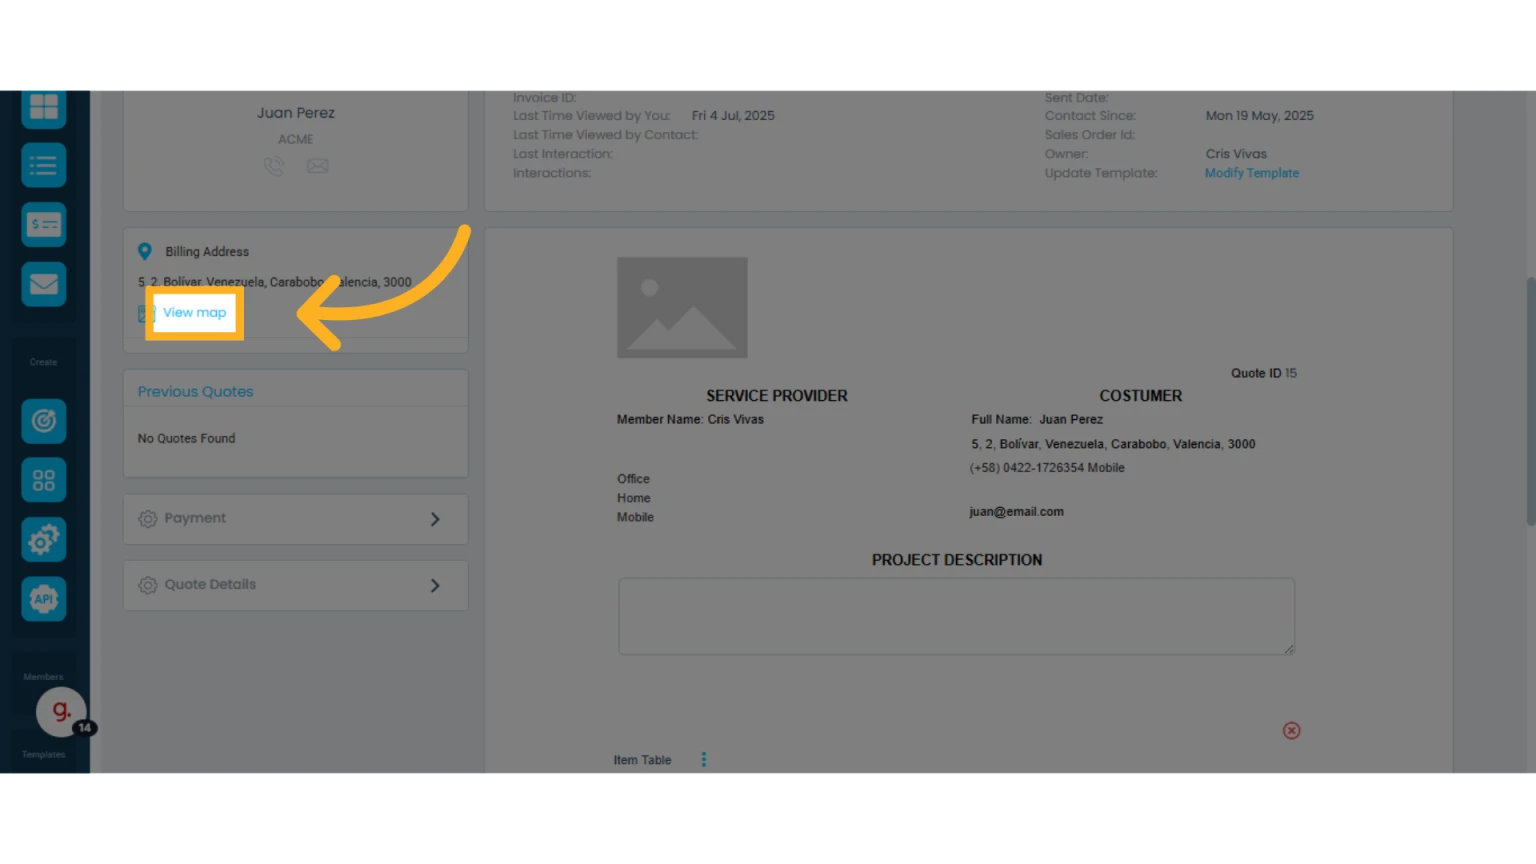
Contact Addresses
Addresses linked to the contact will be displayed in this section. If more than one address of the same type is available, you can select the one or the ones that you want to display on the current quote by clicking on the checkbox.
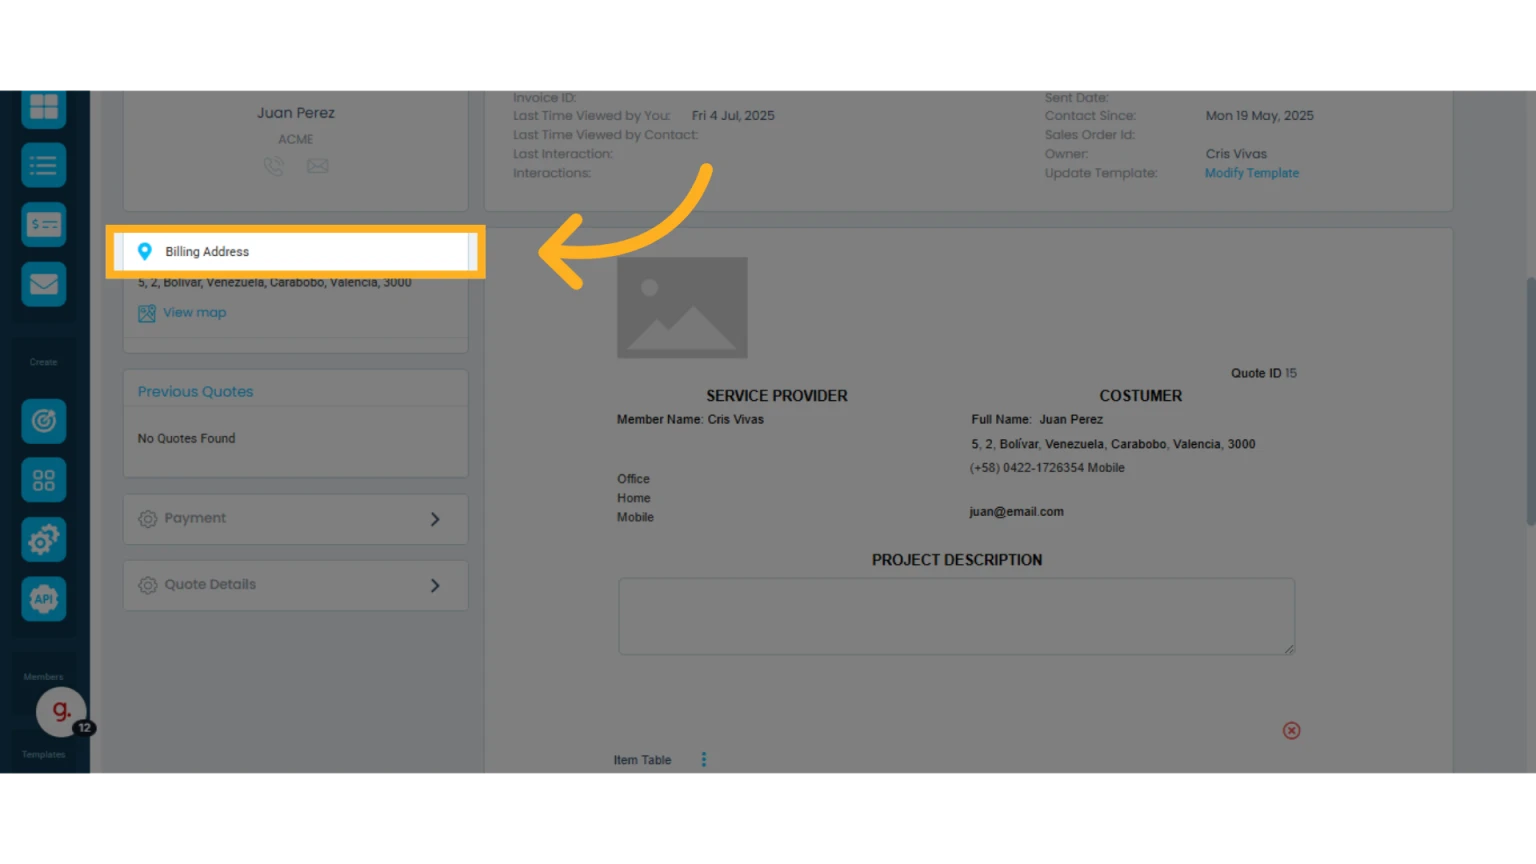
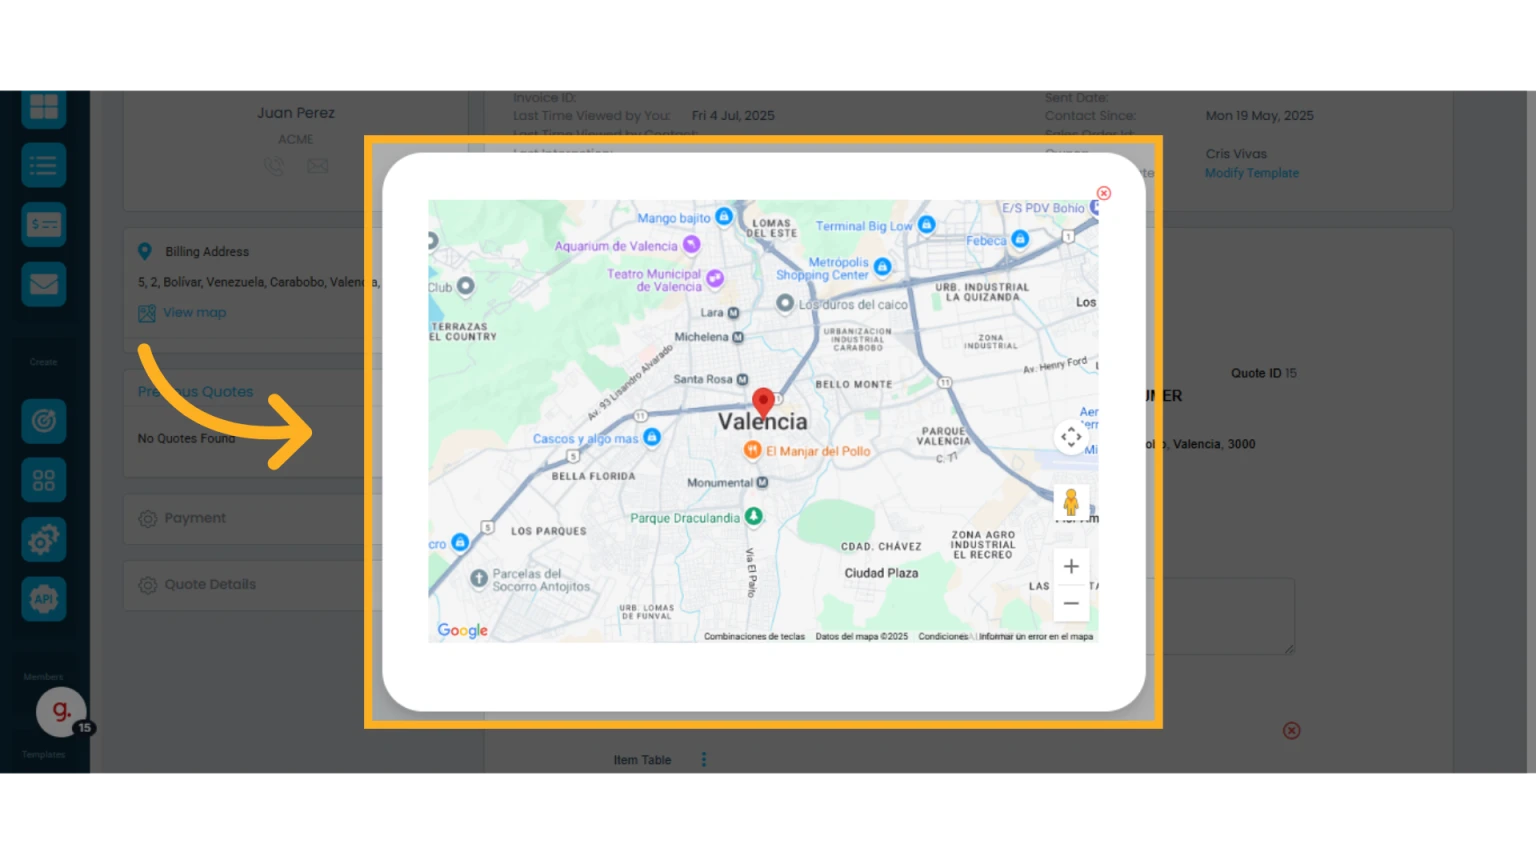
Click "View Map" to open the address in an interactive map.
You can zoom in, zoom out, and explore the location in greater detail.
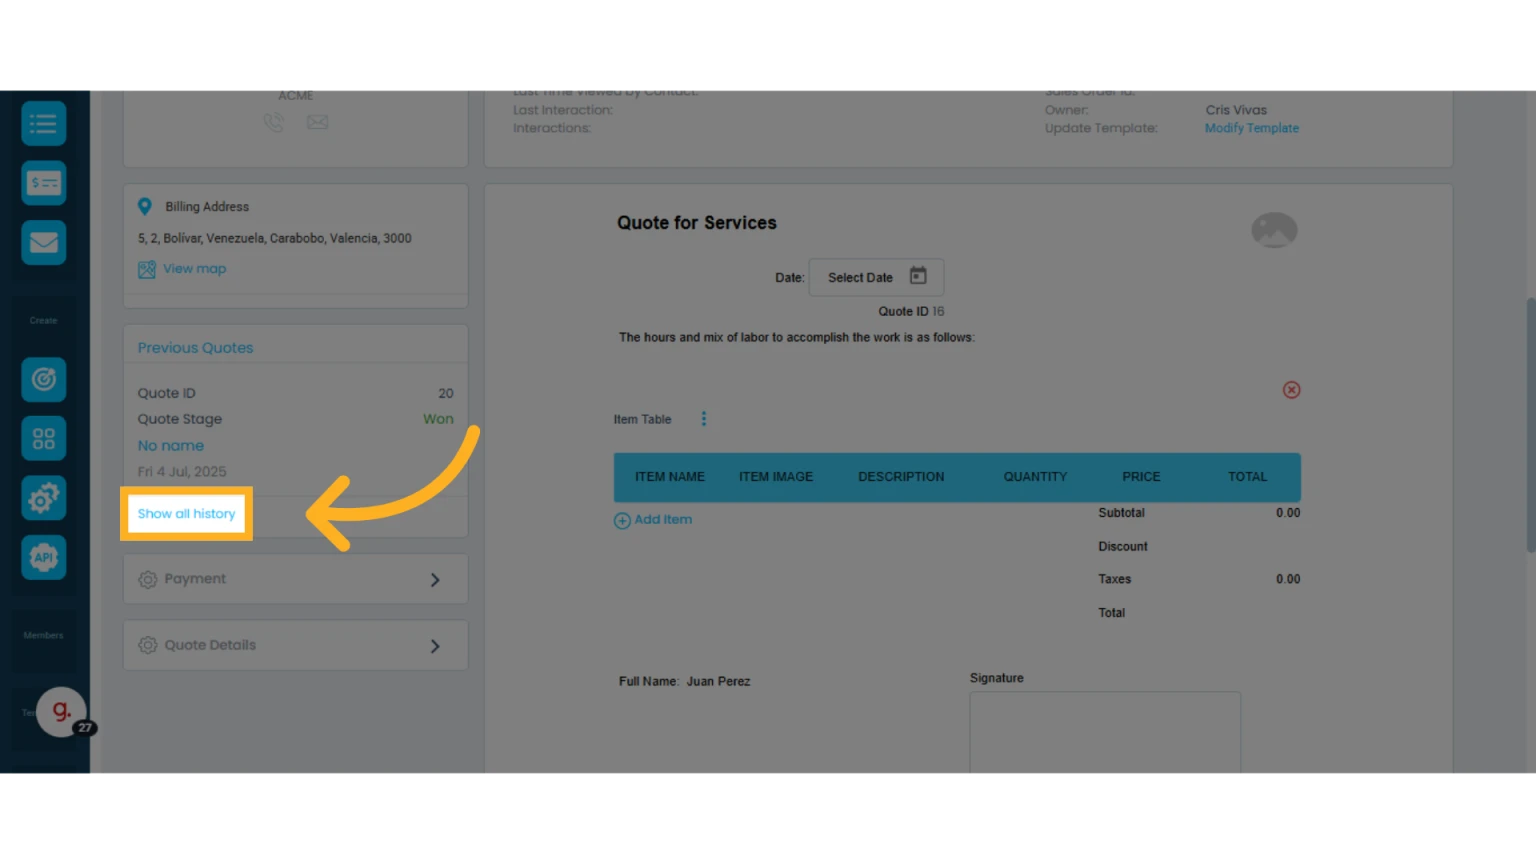
Quote History
In the "Previous Quotes" section, you’ll see a history of all quotes, invoices, and sales orders created for that contact.
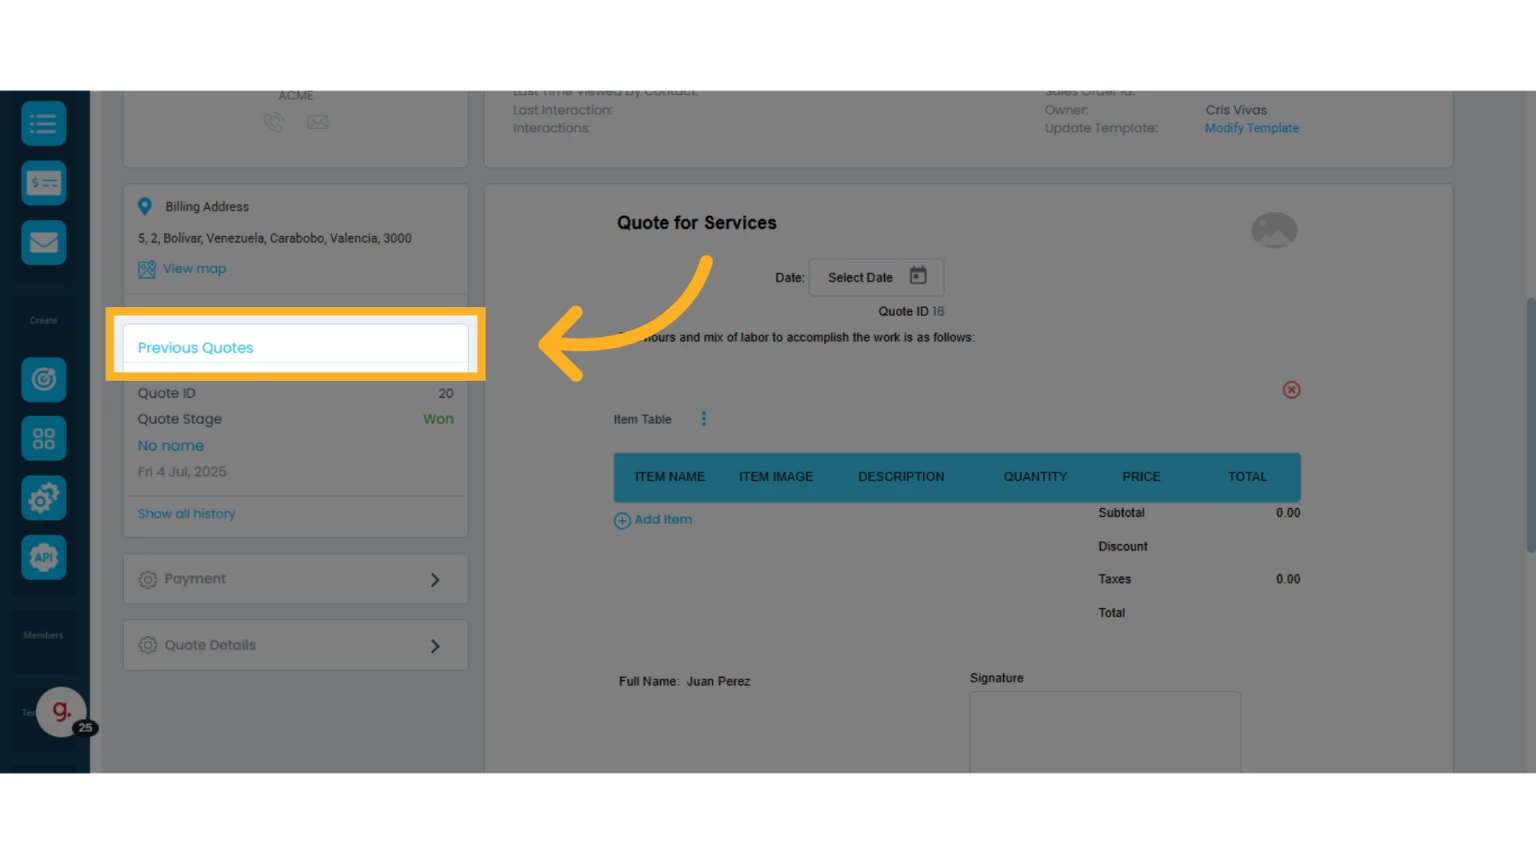
Click "Show all history" to see more details.
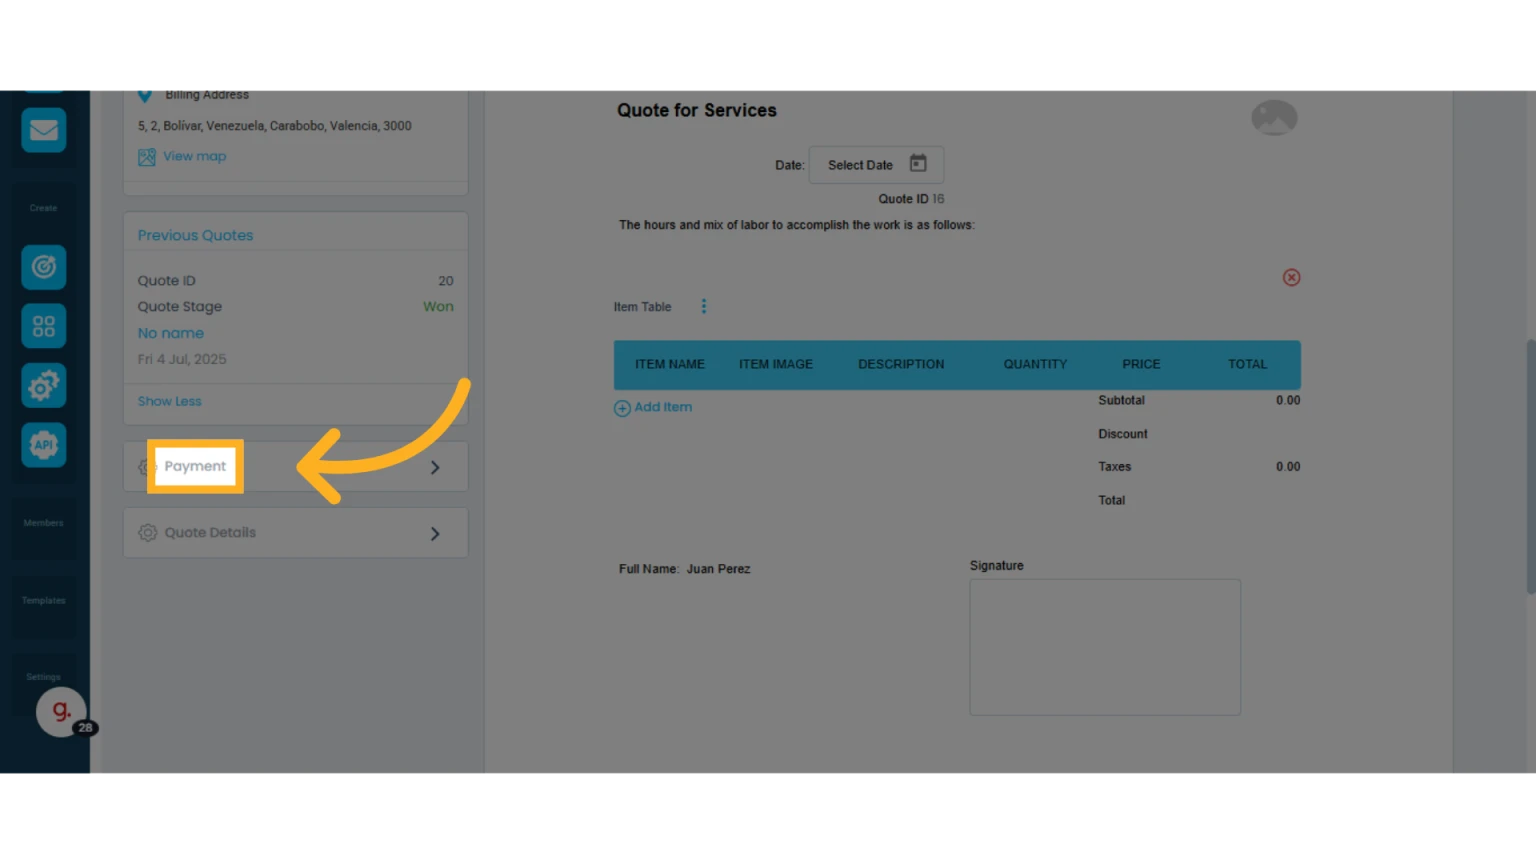
Add a Payment
In this section, you can add payments to the quote and follow up in the Payments module.
Learn how to add payments to a quote.
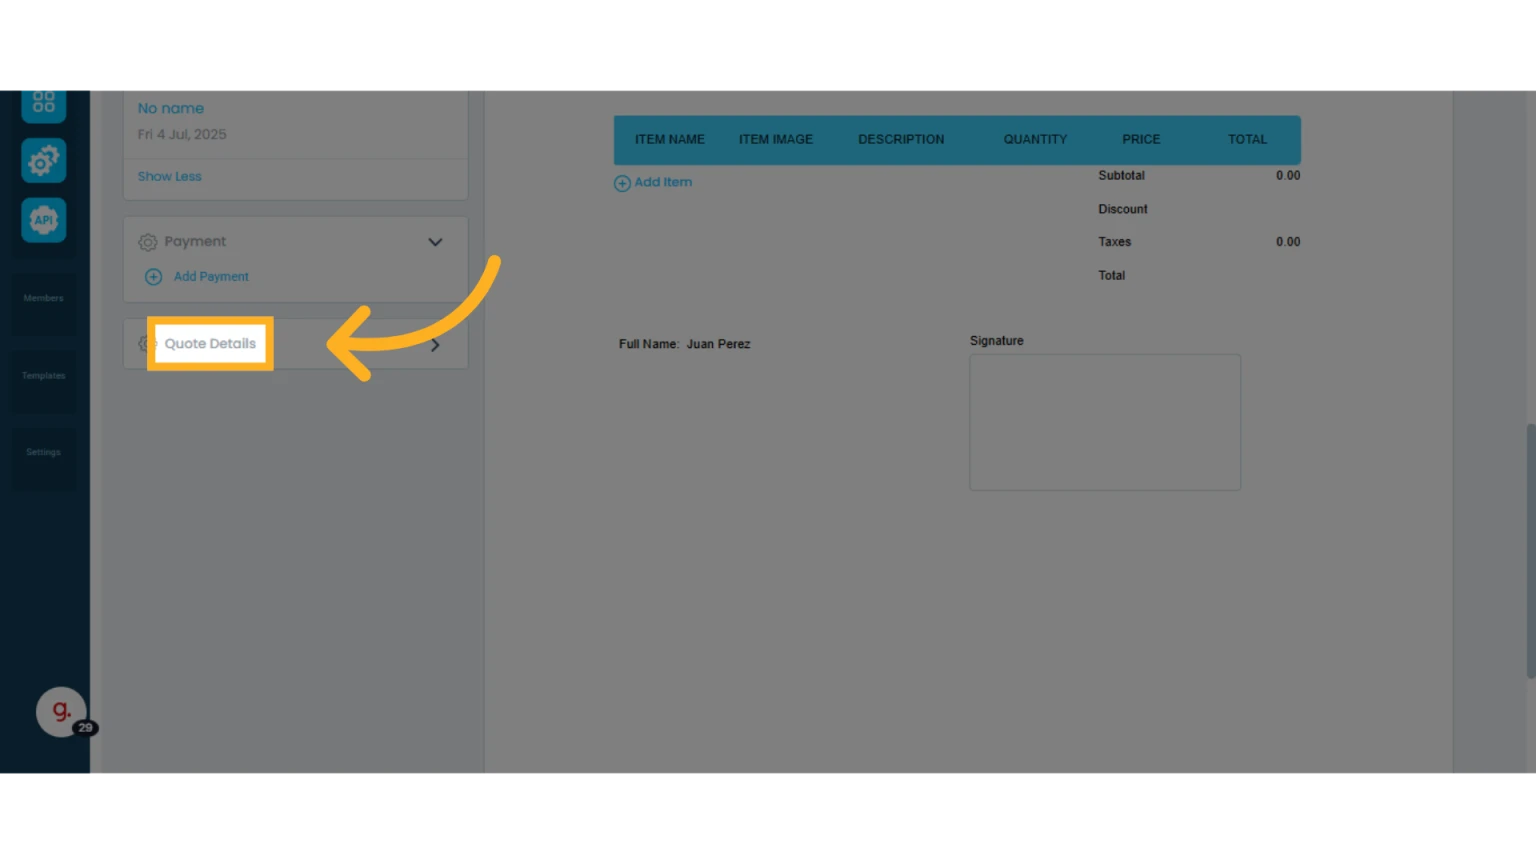
Quote Details
From here you can:
Show or hide taxes: Taxes are configured per item and will automatically appear in the quote when items are added.
Change the currency and set an exchange rate: You can adapt the quote to the client’s preferred currency. If you use a different currency than your default, you can also set the corresponding exchange rate.
Learn how to modify the currency of a quote.
You can also view payment details such as:
Subtotal: Total amount before any discounts or taxes.
Discount: Applied directly to individual items (not globally).
Subtotal after Discount: Total after item-specific discounts.
Taxes: Total calculated taxes.
Cost: Product or service cost as configured in each item.
Total: Final amount to be paid after applying discounts, taxes, and any additional charges.
Commissions: Defined individually per item.
Learn how to add discounts, costs, and taxes to your items.
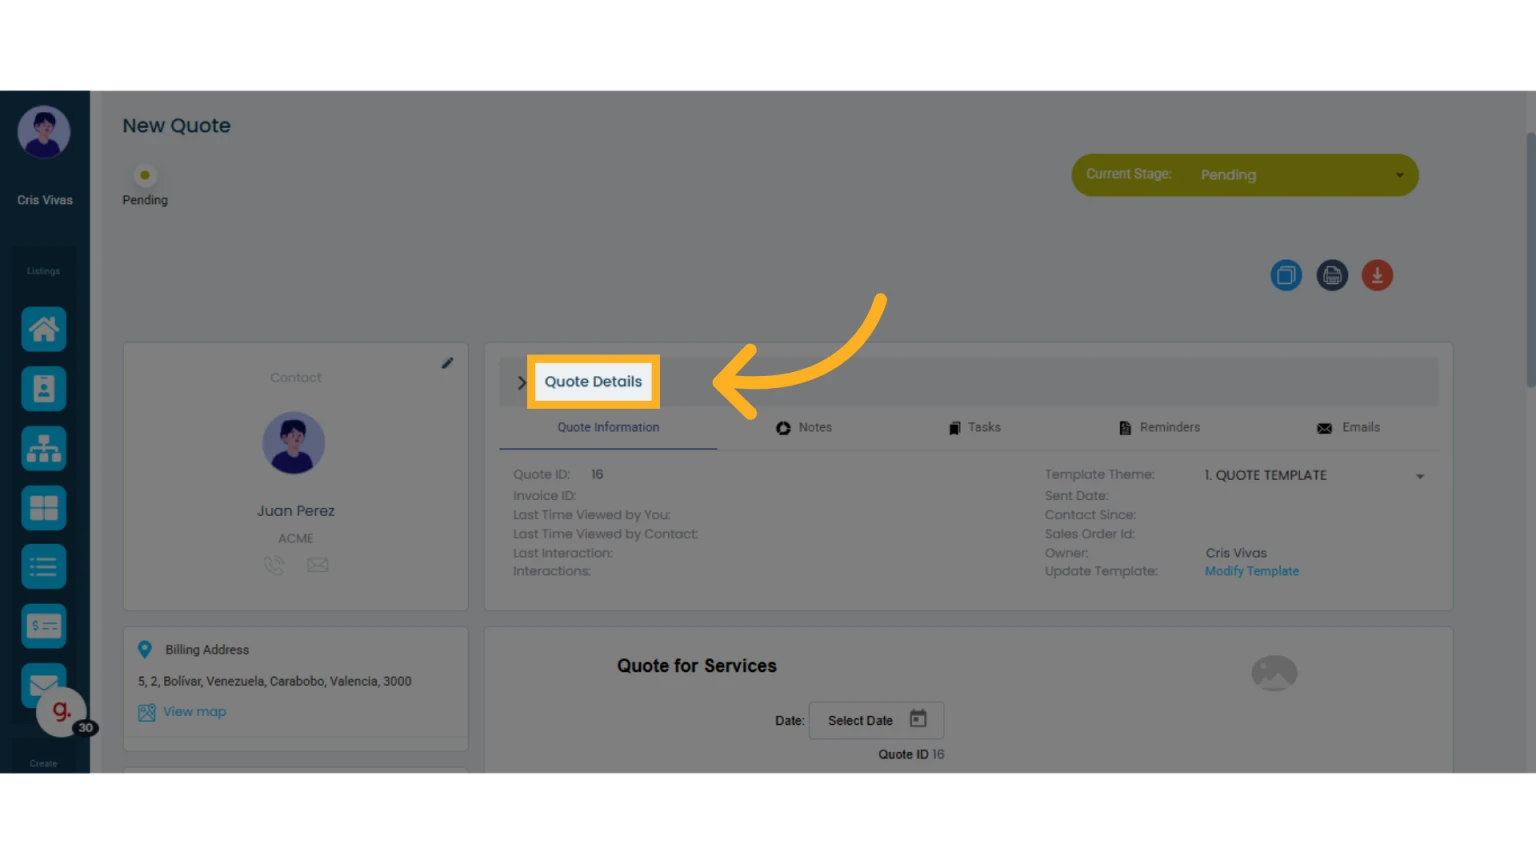
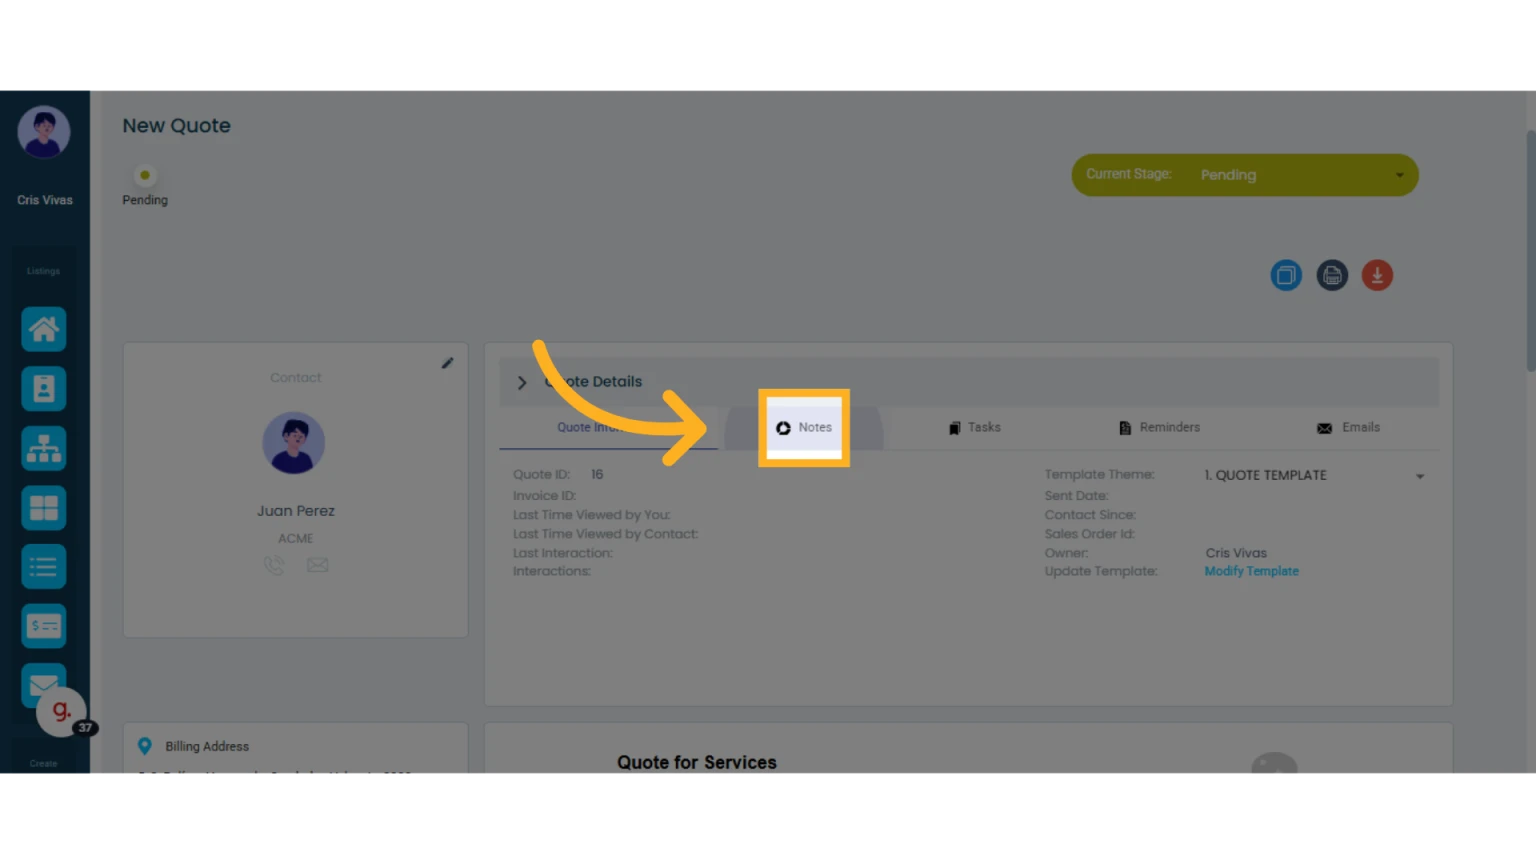
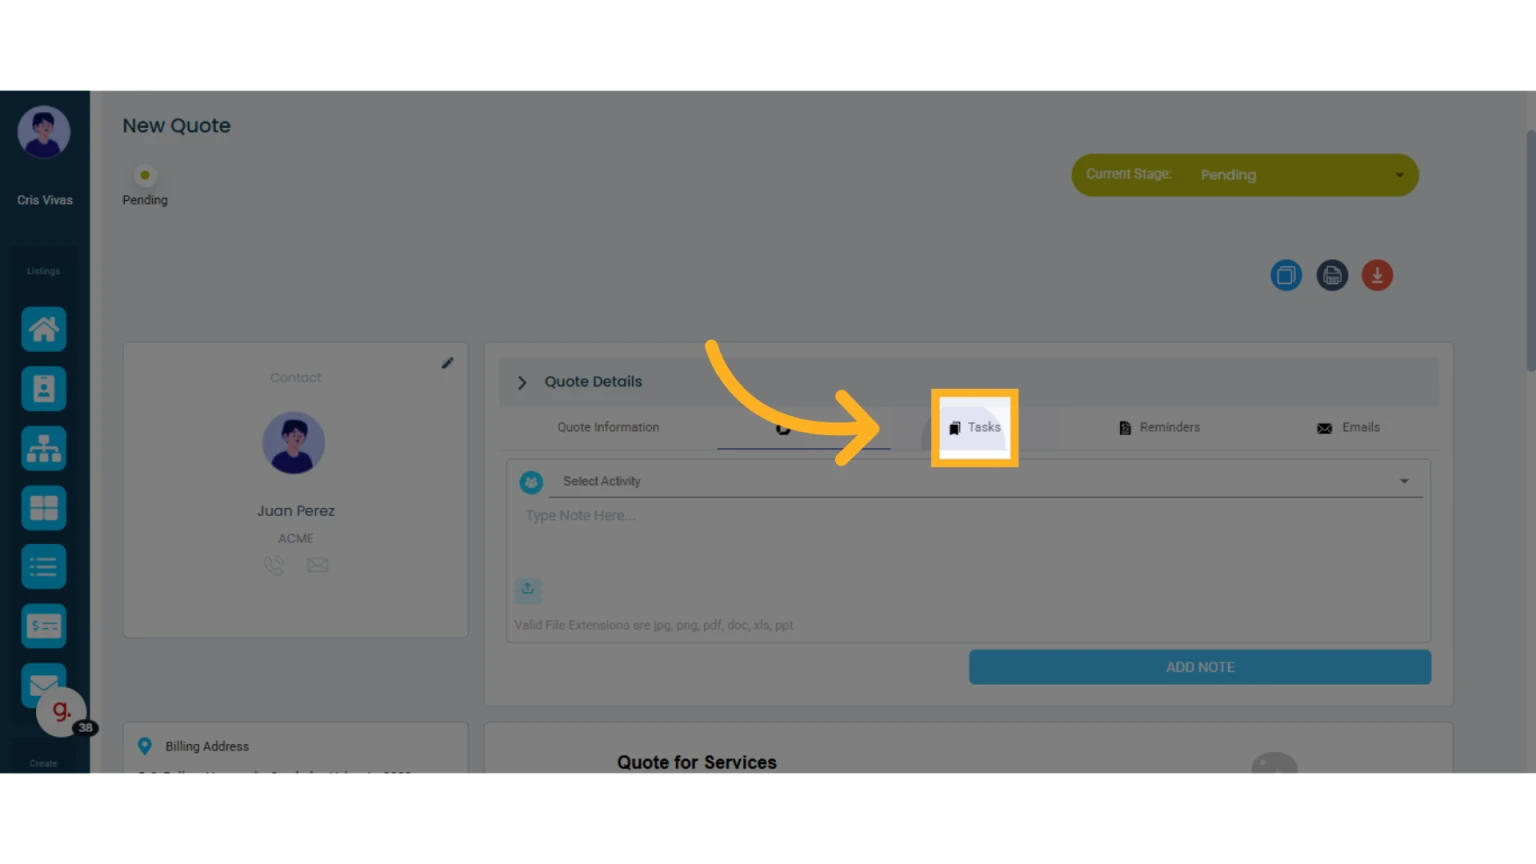
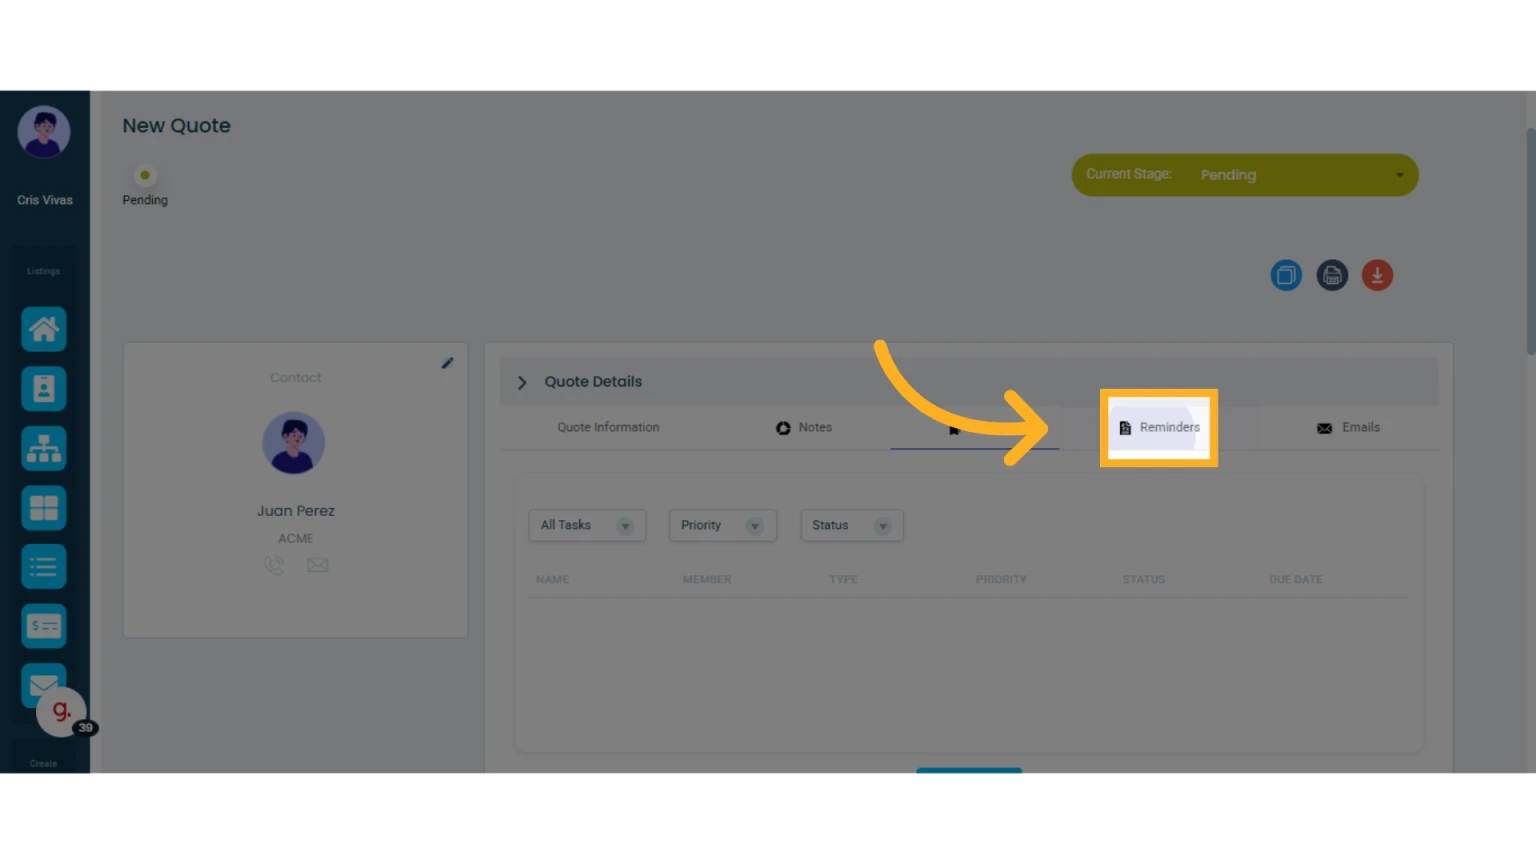
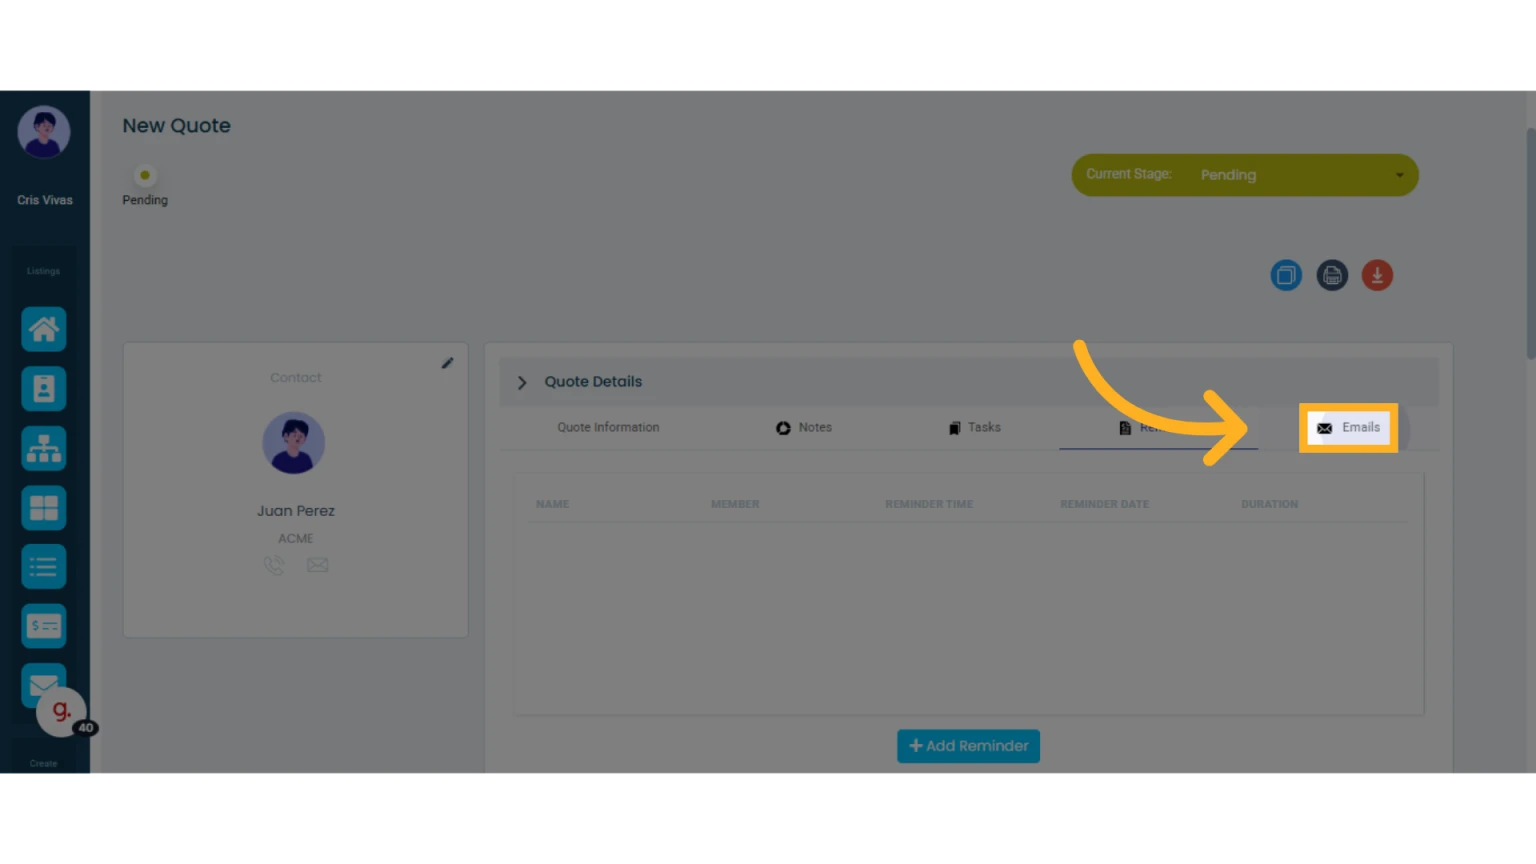
Quote Details
You’ll see different tabs at the top center of the quote.
Quote Details Tab
Expand this section to add relevant information for the quote.
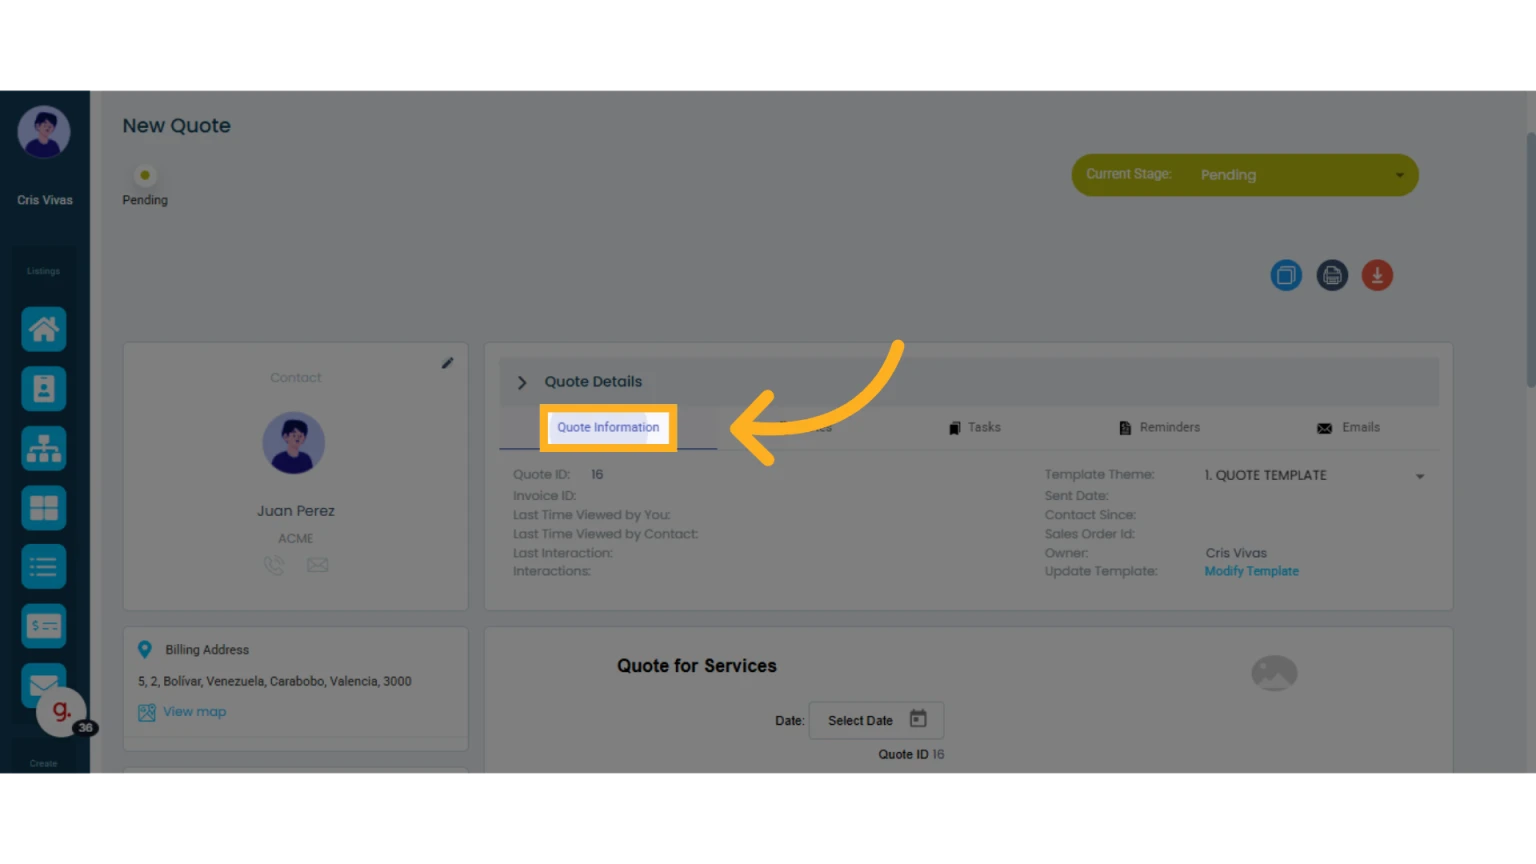
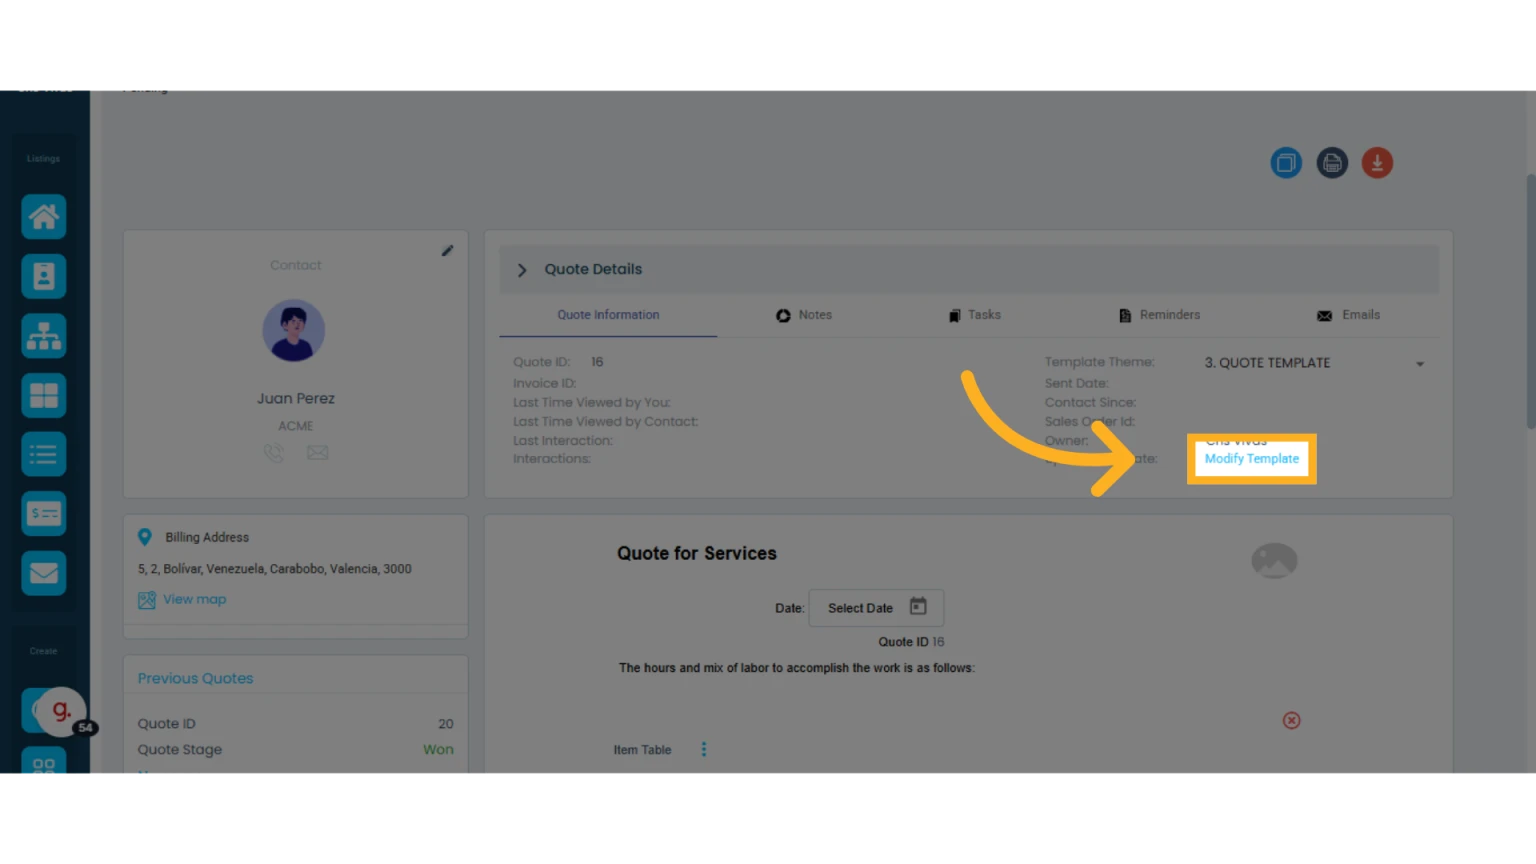
Quote Information Tab
This tab displays data such as:
Quote ID: Automatically generated when the quote is created.
Invoice ID: Only appears if there's an associated invoice.
Last viewed (by you and the contact): Shows when the contact last opened the quote and when you last edited or saved it.
Last interaction date: Indicates when the contact accepted or rejected the quote.
Interactions: Logs if the quote was accepted or rejected.
Template theme: Shows the template currently being used.
Send date: Last time the quote was emailed to the contact.
Contact since: Date when the contact was added to the system.
Sales Order ID: Appears if there’s a linked sales order.
Owner: Name of the team member assigned to the contact.
Update template: Edit the current template’s design.
Notes
In the second tab, you can add internal notes to the quote by typing in the field and clicking "Add Note."
Tasks
In this third tab, you can add tasks related to the quote by clicking "+ Add Task" or view all tasks associated with the quote or contact.
Learn more about tasks in Osmos.
Reminders
In the fourth tab, you can create reminders by clicking "+ Add Reminder" or view existing reminders for the contact.
Learn more about reminders in Osmos.
Emails
The fifth tab shows all emails sent to and received from the contact. Click "Sent Emails" or "Received Emails" to filter the list.
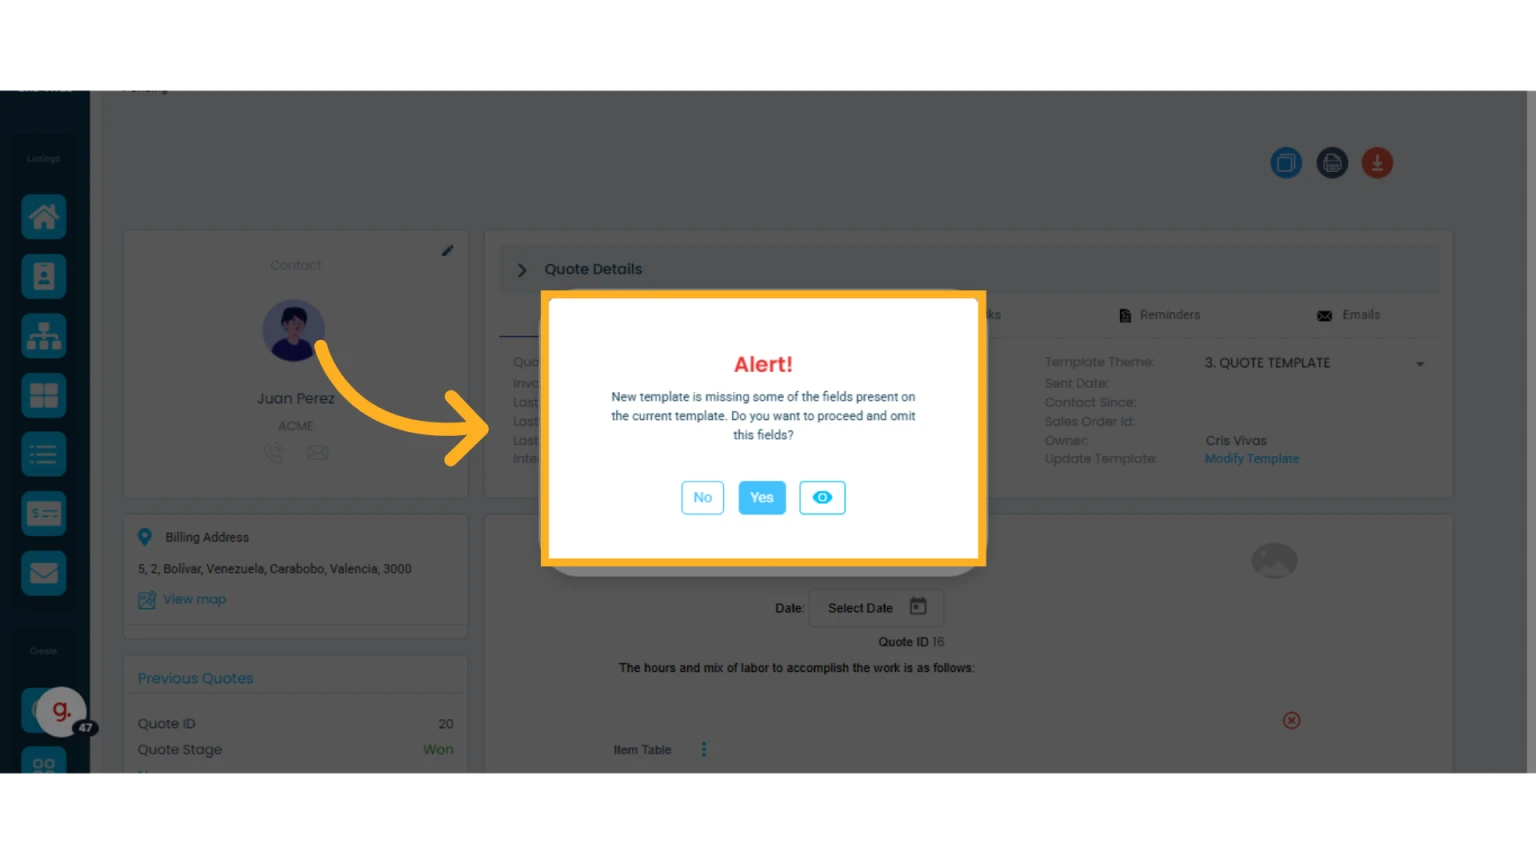
Change or Edit the Quote Template Theme
Change the Quote Template
In the Quote Information tab, you can see the current template theme and change it using the dropdown menu.

When you select a new template, a pop-up alert will appear. If the new template doesn’t include certain elements from the original one, that information won’t be visible in the updated version.
For example, if your original template included a billing address element, and the new template does not, then that information won’t be displayed.
Edit the Quote Template
You can customize the current template’s design by clicking "Edit Template."
Note that changes will apply to all future quotes using this template.
Learn how to modify a quote template.
Add Items
You can add items to the quote by clicking "Add Item."
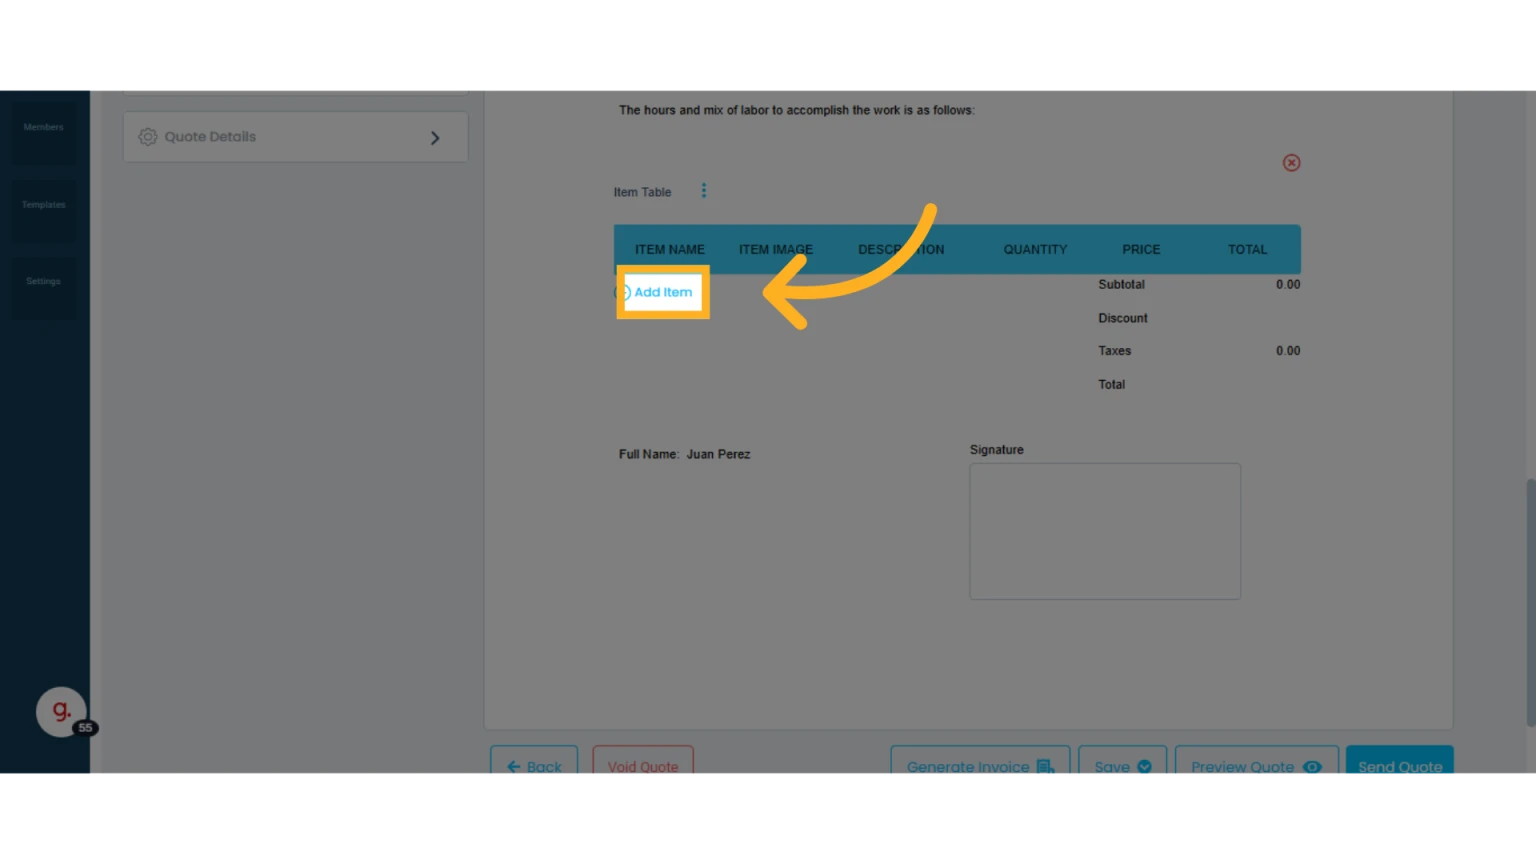
Learn how to add items from a quote.
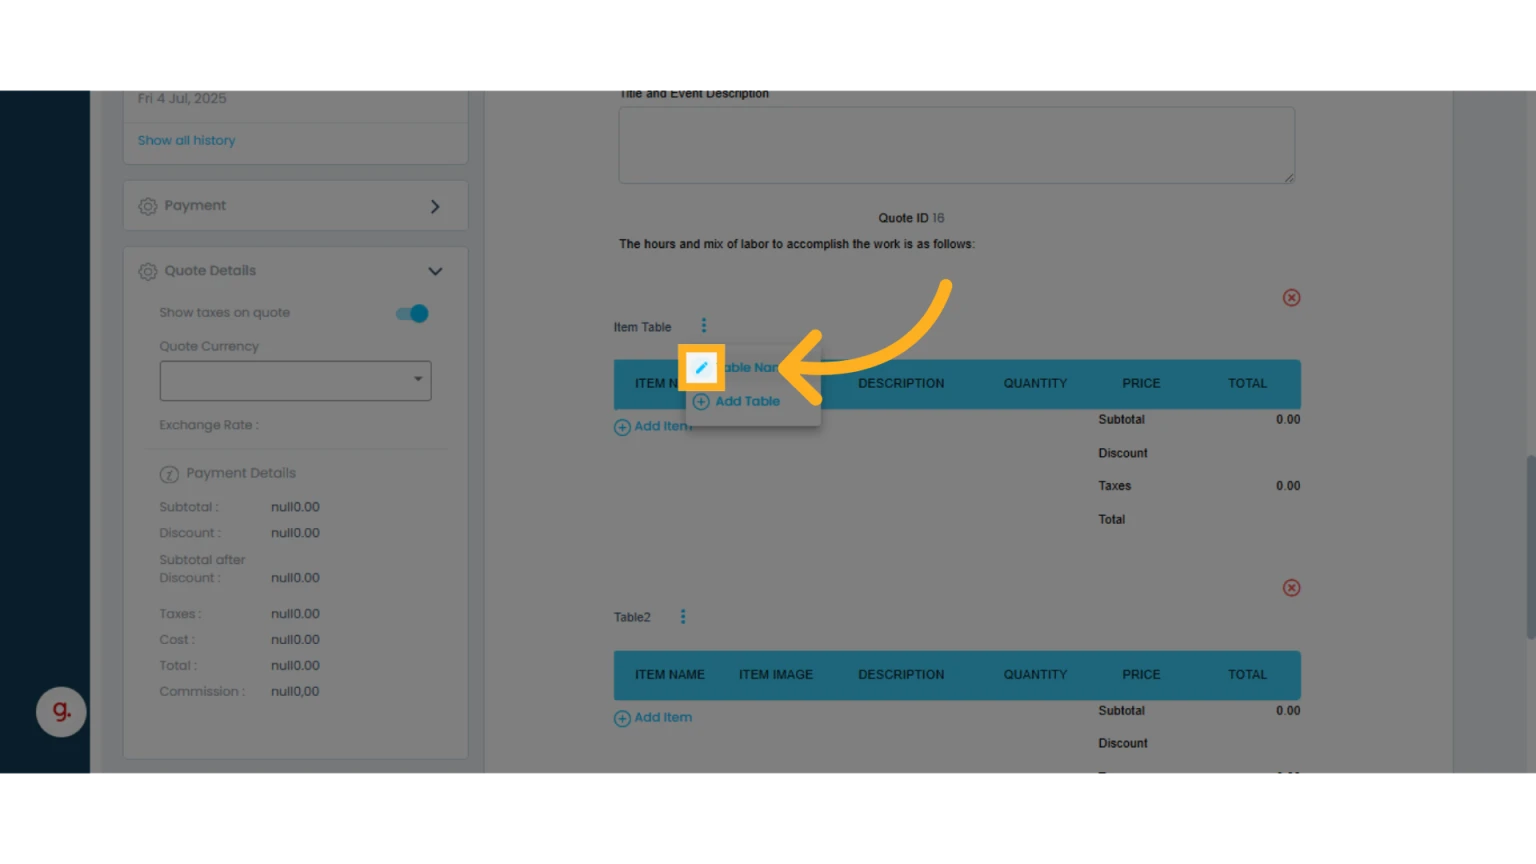
Add Tables
You can add new item tables to separate quotes by product or service type.
Click the three dots next to "Item Table" and select "Add Table."
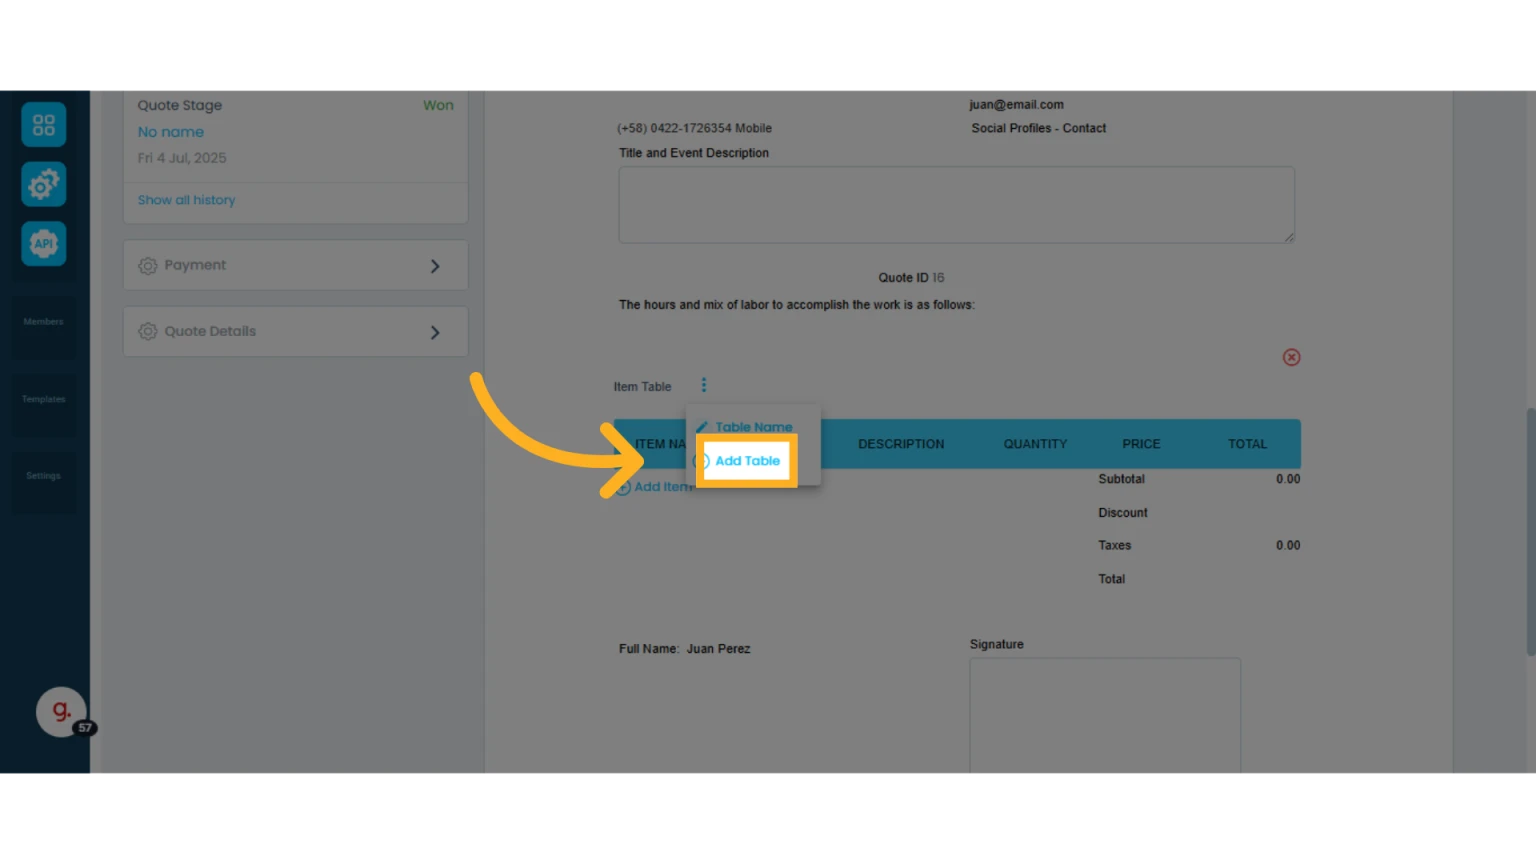
Enter a name for the table and click "Add Table."

To edit the table name, click the pencil icon.
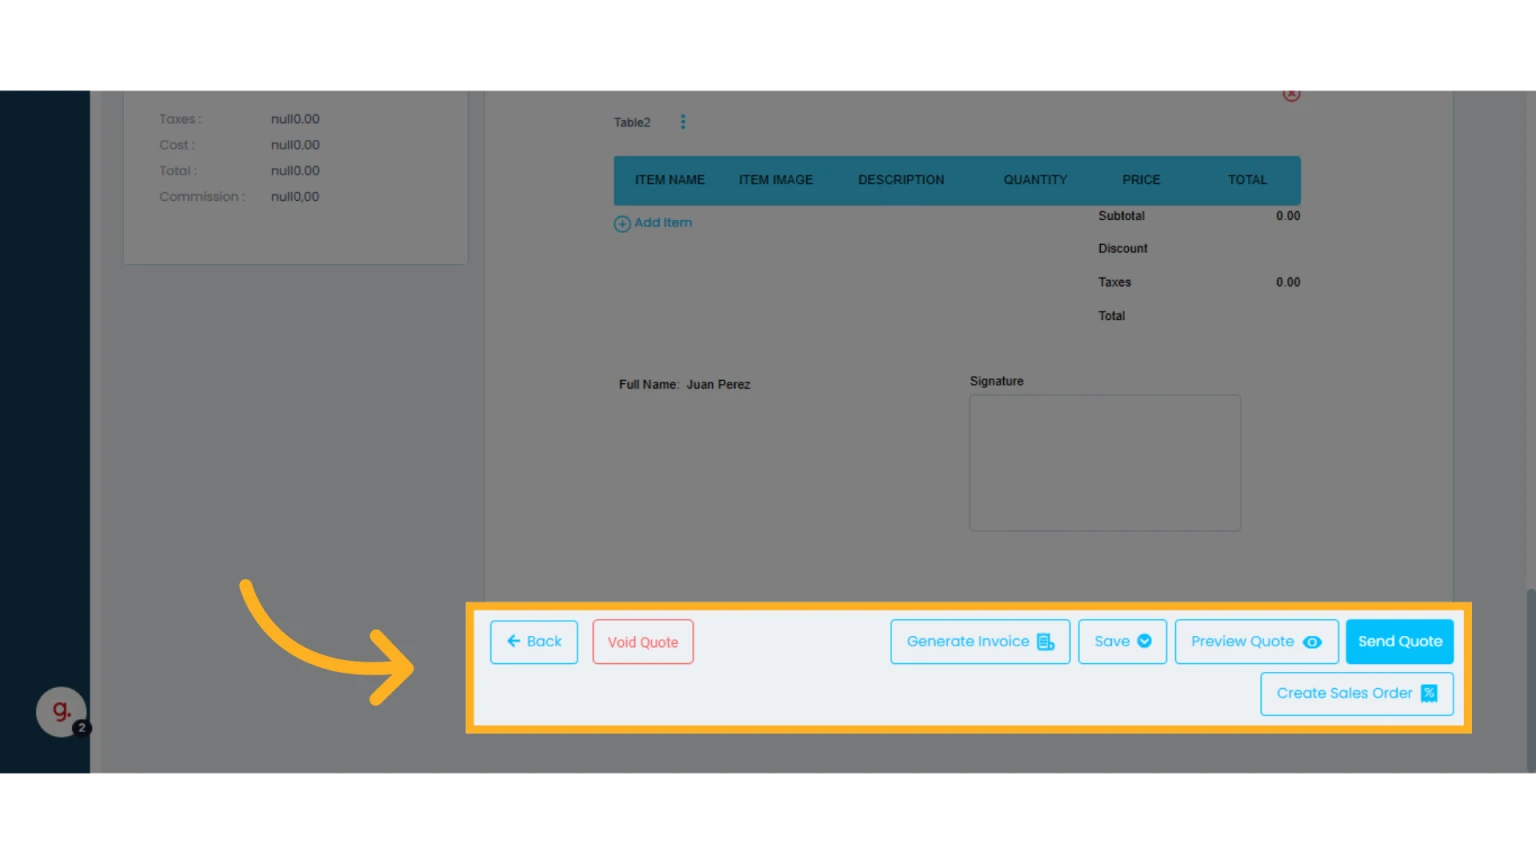
Action Buttons
At the bottom of the quote, you’ll find action buttons to:
Save Quote: Save changes made to the current quote.
Save and Create New Quote: Duplicate the current quote and generate a new one with a different ID.
Save and Create New Version: Duplicate the quote under the same ID but as a new version (e.g., Quote #1 v2).
Preview Quote: Open a preview of how the client will see it.
Send via Email: Send the quote directly to the contact via email.
Send via WhatsApp: Send the quote directly to the contact via WhatsApp. (WhatsApp integration required)
Generate Invoice: Create an invoice based on the quote.
Create Sales Order: Start a sales order from the quote.
Void Quote: Void the quote.
Top Icons
In the upper right corner, you’ll find two icons to copy the quote and download the quote as a PDF.