
An automation is a process based on rules and parameters that, when met, trigger an event (the automation). In simpler terms, the automation checks whether a defined rule is met, and if so, it fires or executes an event or action.
Example: If I send a quote (the rule), then a follow-up email is sent the next day (the action).
To create an automation, follow these steps:
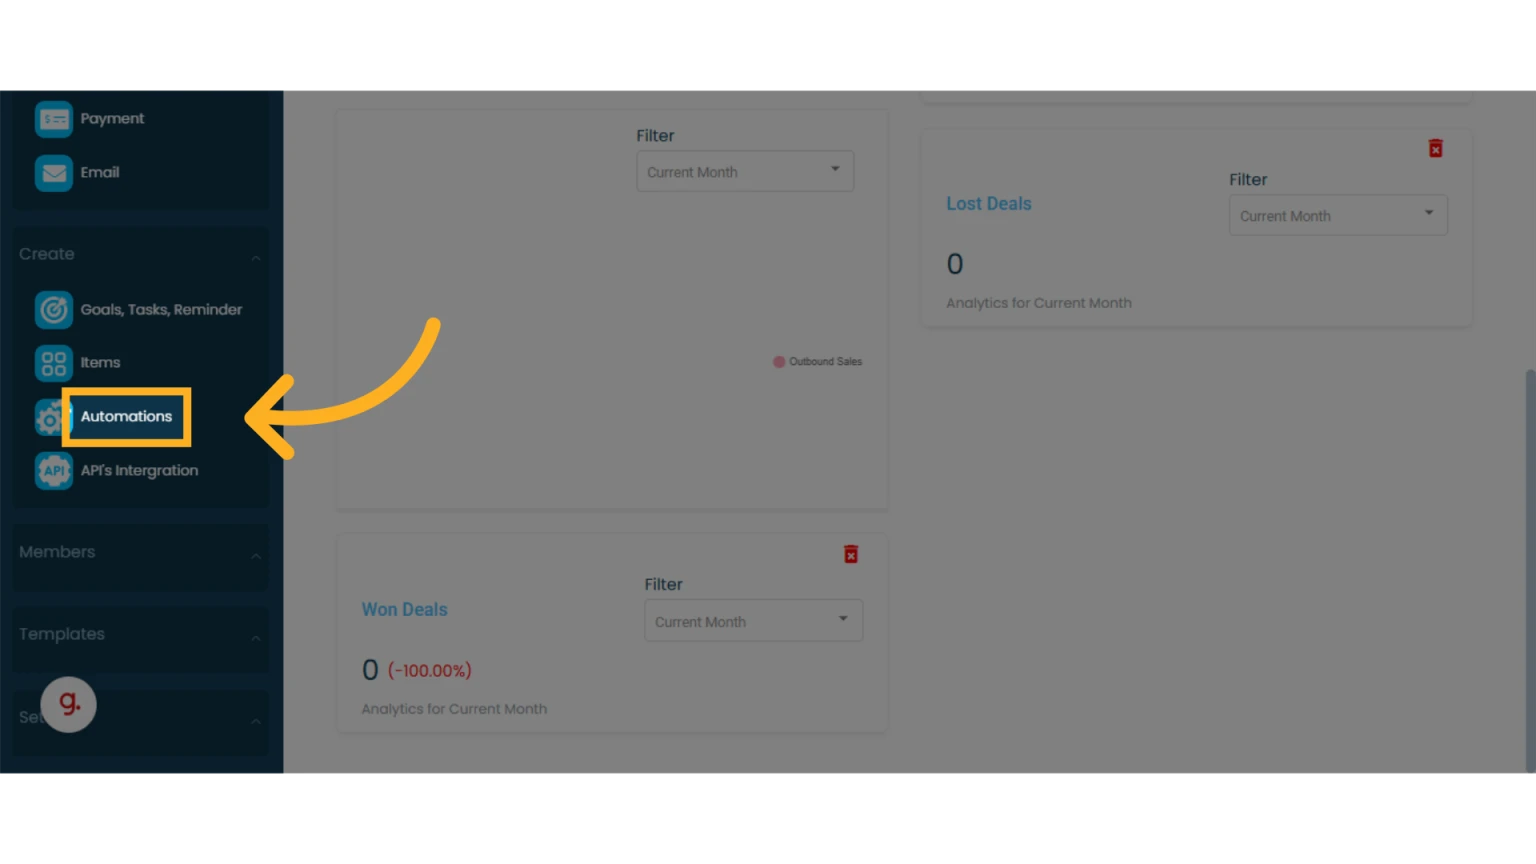
1. Click on “Automation” in the main left-hand menu
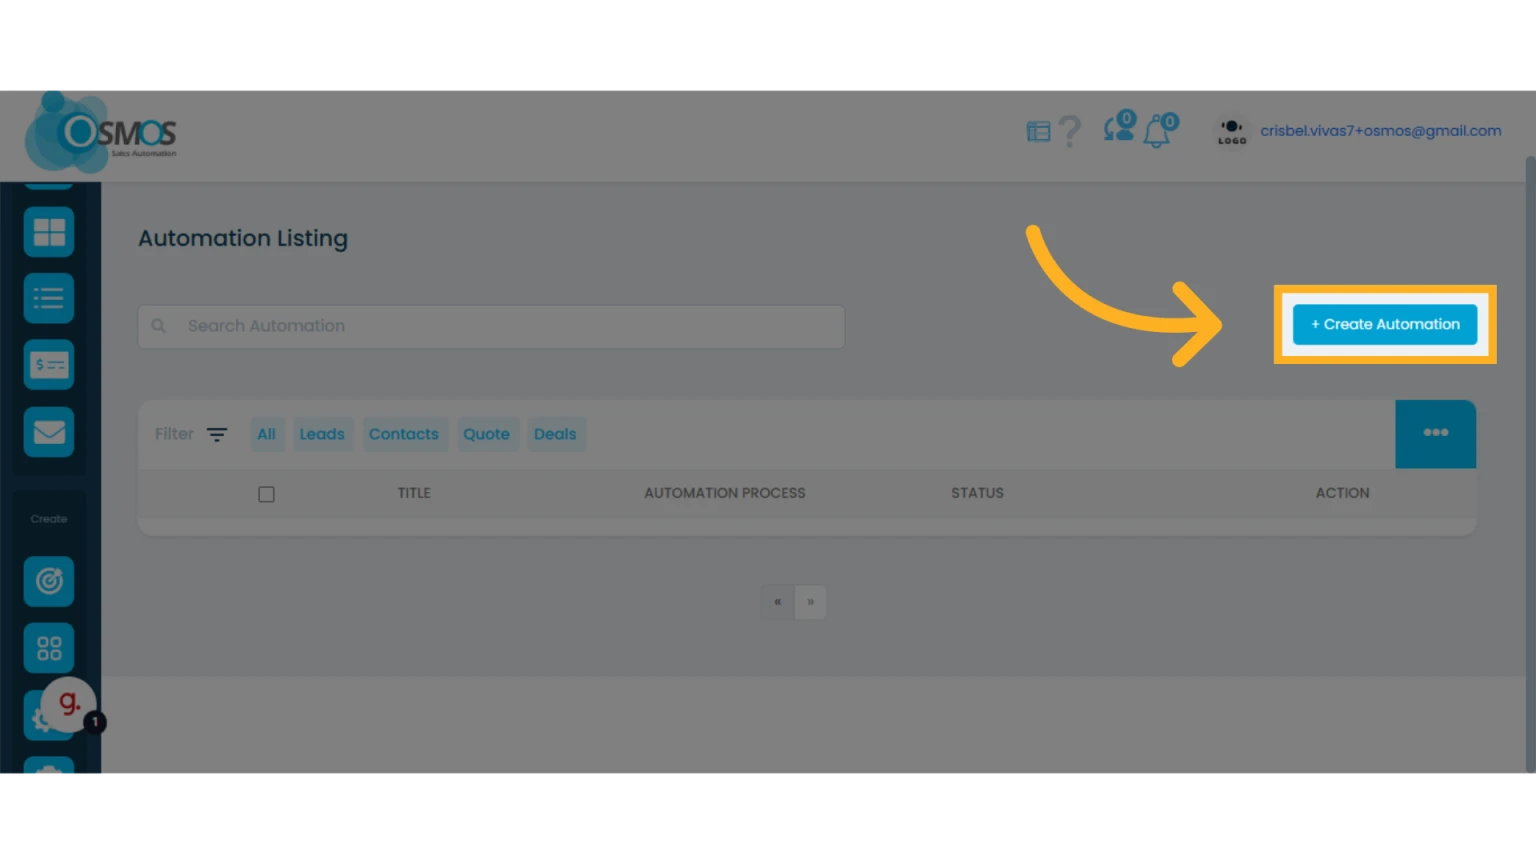
2. Click the “+ Create Automation” button
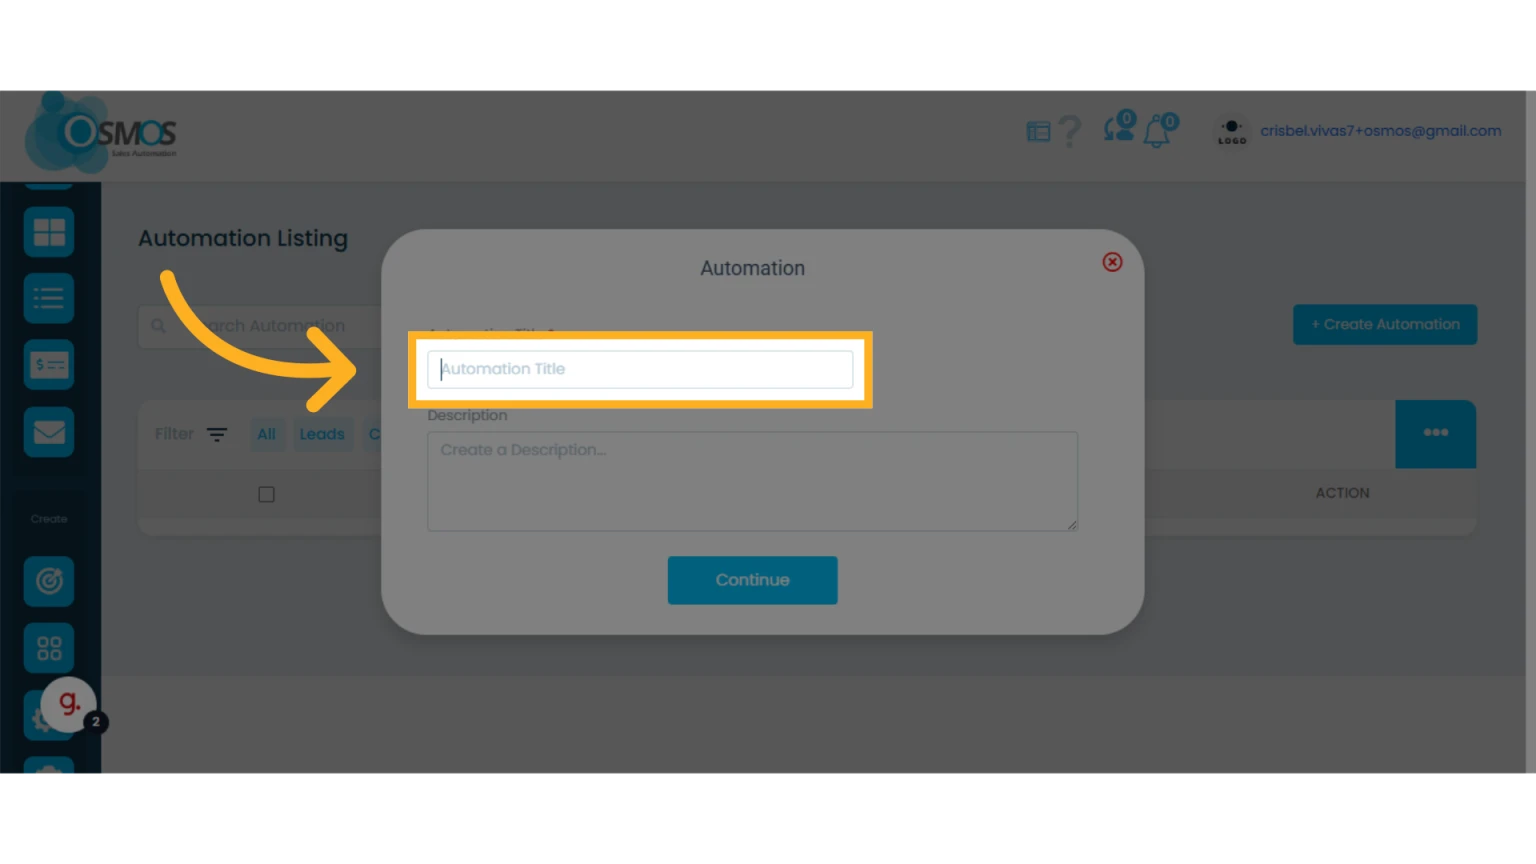
3. Create a title for your automation and, optionally, write a description
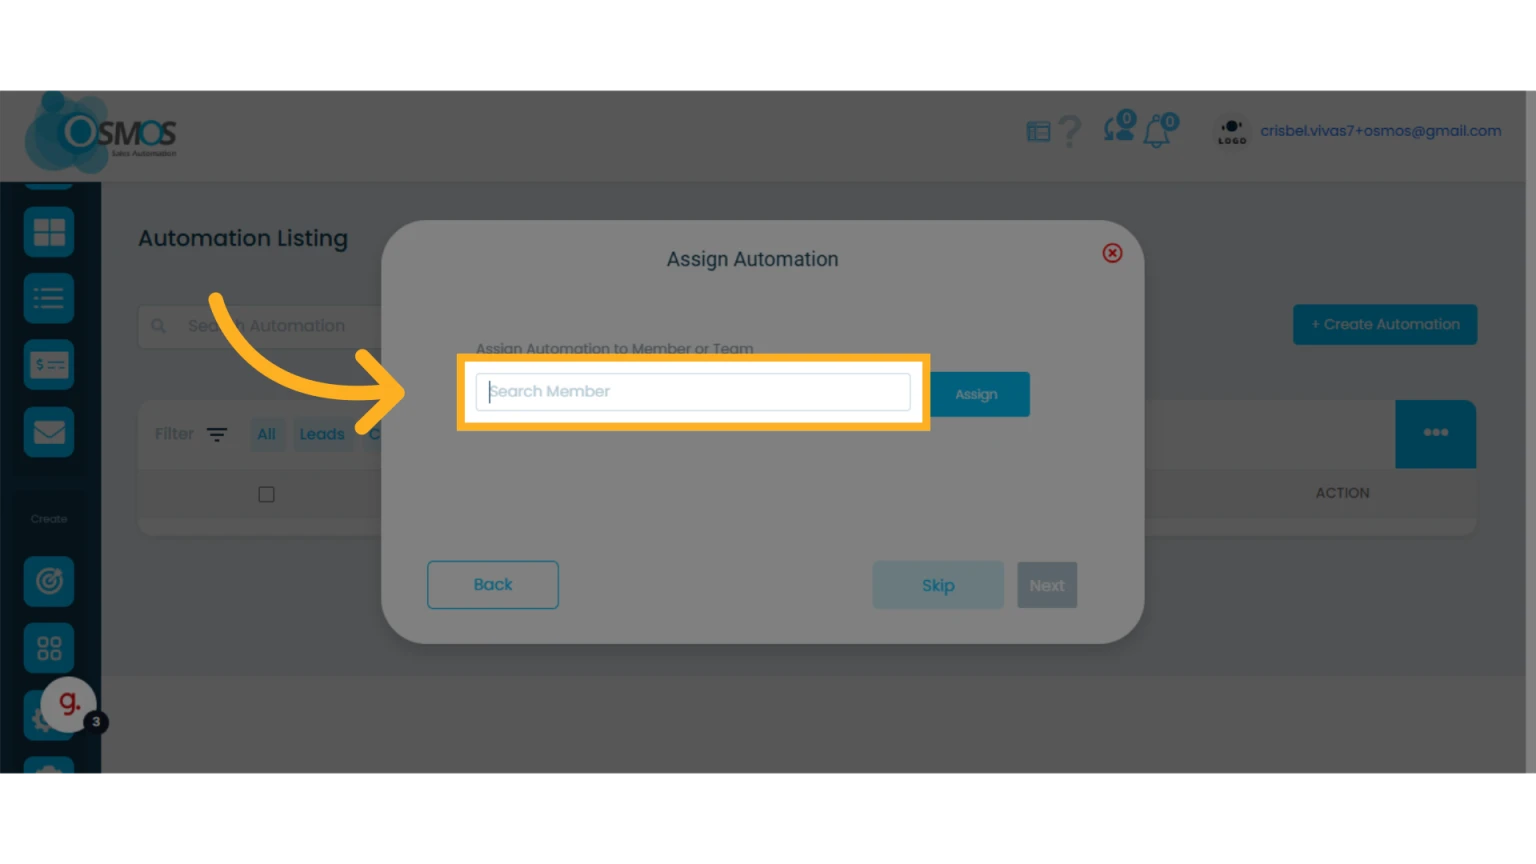
4. Assign one or more members to the automation
The members assigned to the automation are the ones to whom the automation will apply.
You can click “Skip” to bypass this step. Later on, you can assign or remove members from automation.
5. Select the trigger category and the trigger
The first step in any automation process is defining the trigger.
The trigger is the action that initiates the automation. These are events or conditions that must be met for the automation to run.
Trigger categories include:
Leads
Contacts
Quotes
Deals

6. Select the trigger
Each category has its own set of triggers. Below is a detailed description of each:
Lead Triggers
When a new lead is created: Triggered when a new lead is created within the CRM.
If the lead’s tag is: Triggered when a specific tag is added to a lead. You must select one of the pre-existing tags.
Contact Triggers:
When a new contact is created: Triggered when a new contact is created.
If the contact’s tag is: Triggered when a specific tag is added to a contact. You must select one of the pre-existing tags.
If the contact is assigned to: Triggered when a contact is assigned to a specific team member. You must select the member.
Deal Triggers
When deal tag is: Triggered when a specific tag is added to the deal. You must select one of the pre-existing tags.
When deal {enter or exit a stage}: Triggered when a deal moves into or out of a stage. You must define whether it’s entering or exiting, and then select the deal type and stage(s).
When deal days on stage have been {<=, =, =>}: Triggered when a deal has spent a certain number of days in a stage. You must select the operator, number of days, deal type, and stage.
When deal value is {<=, =, =>} than: Triggered when the value of a deal reaches a specific amount in a stage. You must select the operator, value, deal type, and stage.
When deal forecast date is {<=, =, =>} than: Triggered when the expected close date of a deal is within a specific number of days. You must select the operator, days, deal type, and stage.
When deal has been more than {days}, mark as {abandoned or lost}: Triggered when a deal remains in a stage for a certain time. You must define the number of days, deal type, stage, whether to mark it as lost or abandoned, and the reason.
When deal is rotten in: Triggered when a deal is identified as rotten in a specific stage. You must select the deal type and stage. Learn more about rotten deals.
When deal is marked as {won, lost, abandoned}: Triggered when a deal is marked with one of these outcomes.
Quote Triggers
When a new quote is created: Triggered when a new quote is created.
When the quote value is <=, =, =>: Triggered when the quote reaches a specific amount. You must select the operator and quote value.
When the quote is opened or not: Triggered based on whether the client opens/reads the quote after a certain number of days.
When the quote is accepted or rejected: Triggered when the client clicks to accept or reject the quote.
When the quote enters or exits a stage: Triggered when the quote moves into or out of a particular stage. You must select the direction and the stage.
If the quote hasn’t been updated in: Triggered when the quote hasn’t been updated within a specific number of days.
When the quote is accepted or rejected, change to stage: Triggered when the client accepts or rejects the quote. Once clicked, the quote is automatically moved to a new stage. You must select the action and the new stage.
When the quote is created via eQuote: Triggered when a quote is received through eQuote. Learn more about eQuotes.
When the quote was created on: Triggered based on the quote’s creation date. You must define the operator, number of days, and stage.
When the quote’s {custom field} is: Triggered when a custom field in the quote has a specific value.
When the quote’s {custom date} is: Triggered when the quote’s selected date is compared to a specific date or number of days before or after the specified custom date. You must select the date type, operator, number of days or date, and stage.
When the quote includes item: Triggered when the quote contains a specific item and stage. You must select the item and stage.
When the quote is marked as invoice: Triggered when a quote is marked as invoiced.
When the quote is sent: Triggered when a quote is sent for the first time or in follow-up emails from a specific stage.
If the quote stays in {stage} after {days}, change to {stage}: Triggered when the quote doesn’t move from a stage within a set number of days. The automation automatically updates the quote stage.
7. Click the “+” icon on the left side of the automation builder
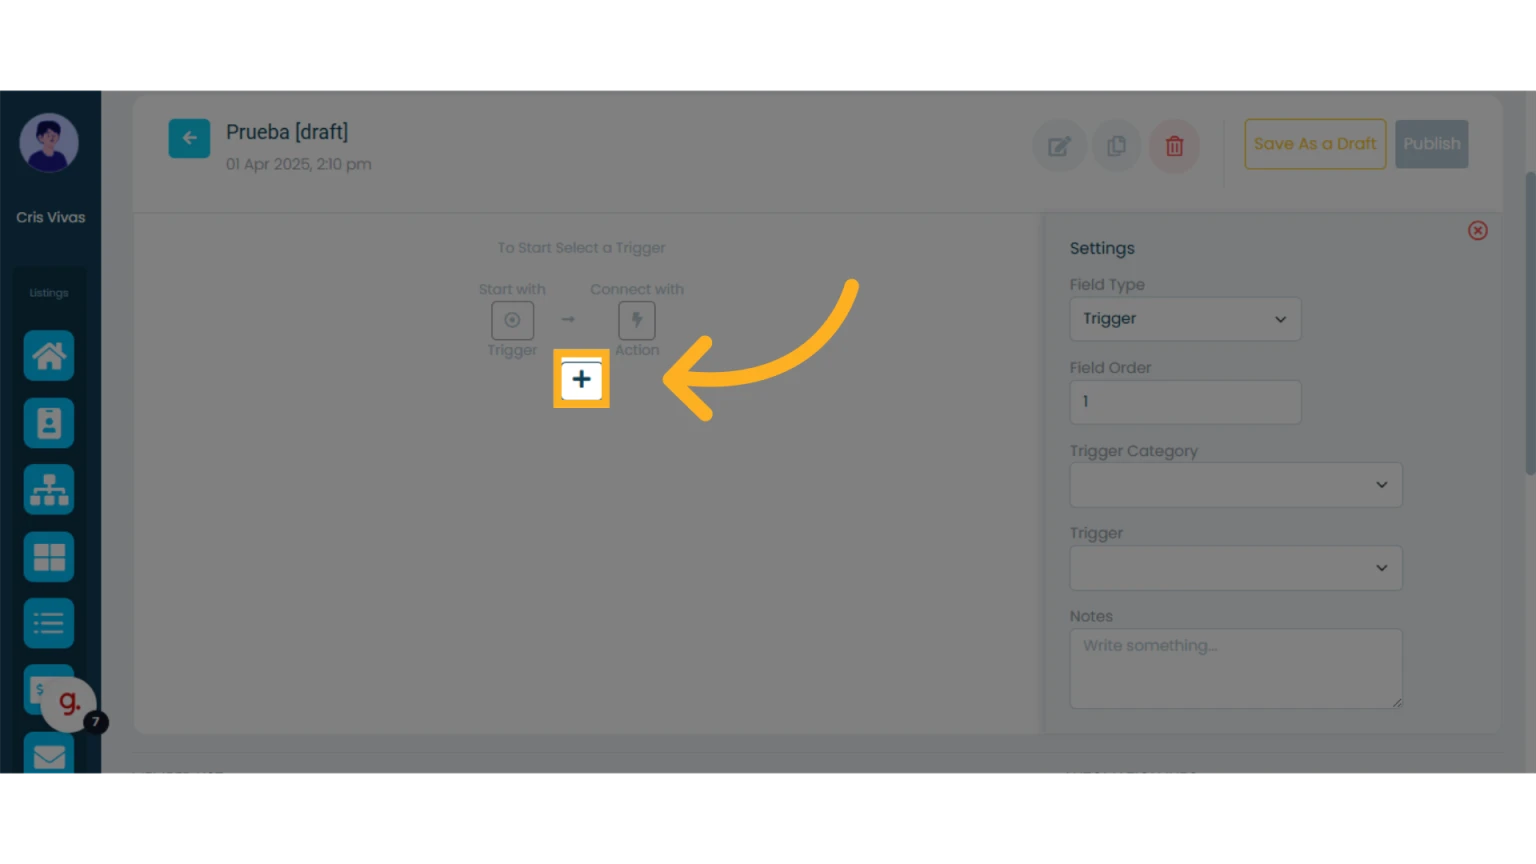
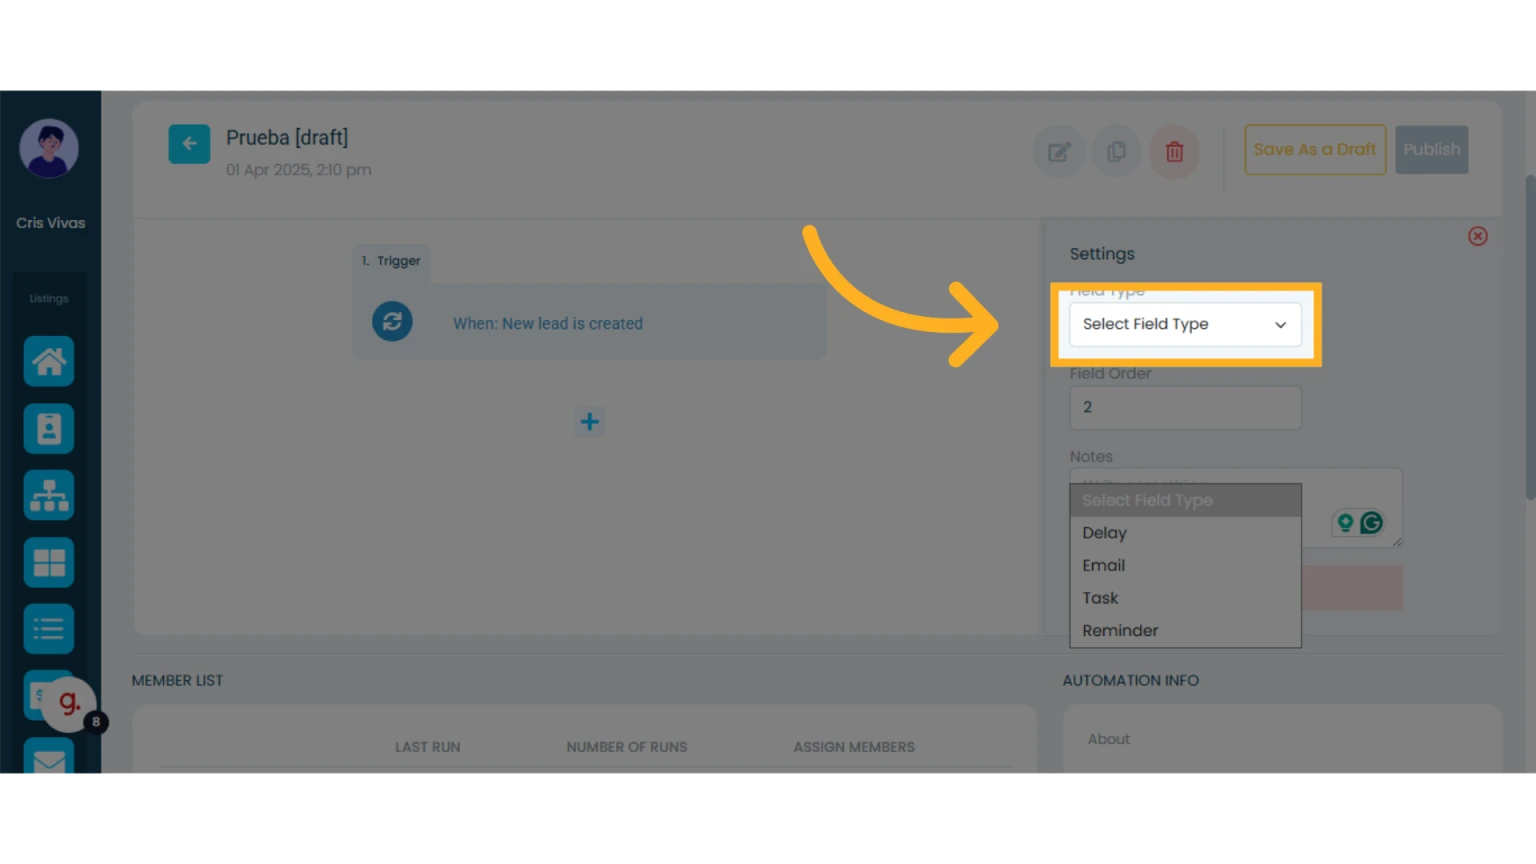
8. Select one of the four field types to continue the automation
Now choose the action you want the automation to perform after the trigger.
Wait: Set the number of days to wait before executing the next step.
Send Email: Select from your pre-built email templates.
Learn more about email templates.Create Reminder: Adds a reminder to the Osmos calendar for any member.
Learn more about reminders.Create Task: Creates a task in Osmos for any team member.
Learn more about tasks.
You can continue adding more steps by clicking the “+” icon again.
9. Publish the Automation
To publish your automation, click the “Publish” button in the top right corner.