
Integrating WhatsApp with Osmos enables you to send quote notifications directly to clients via WhatsApp, offering a more immediate, personal, and engaging experience compared to email.
Connecting the APP
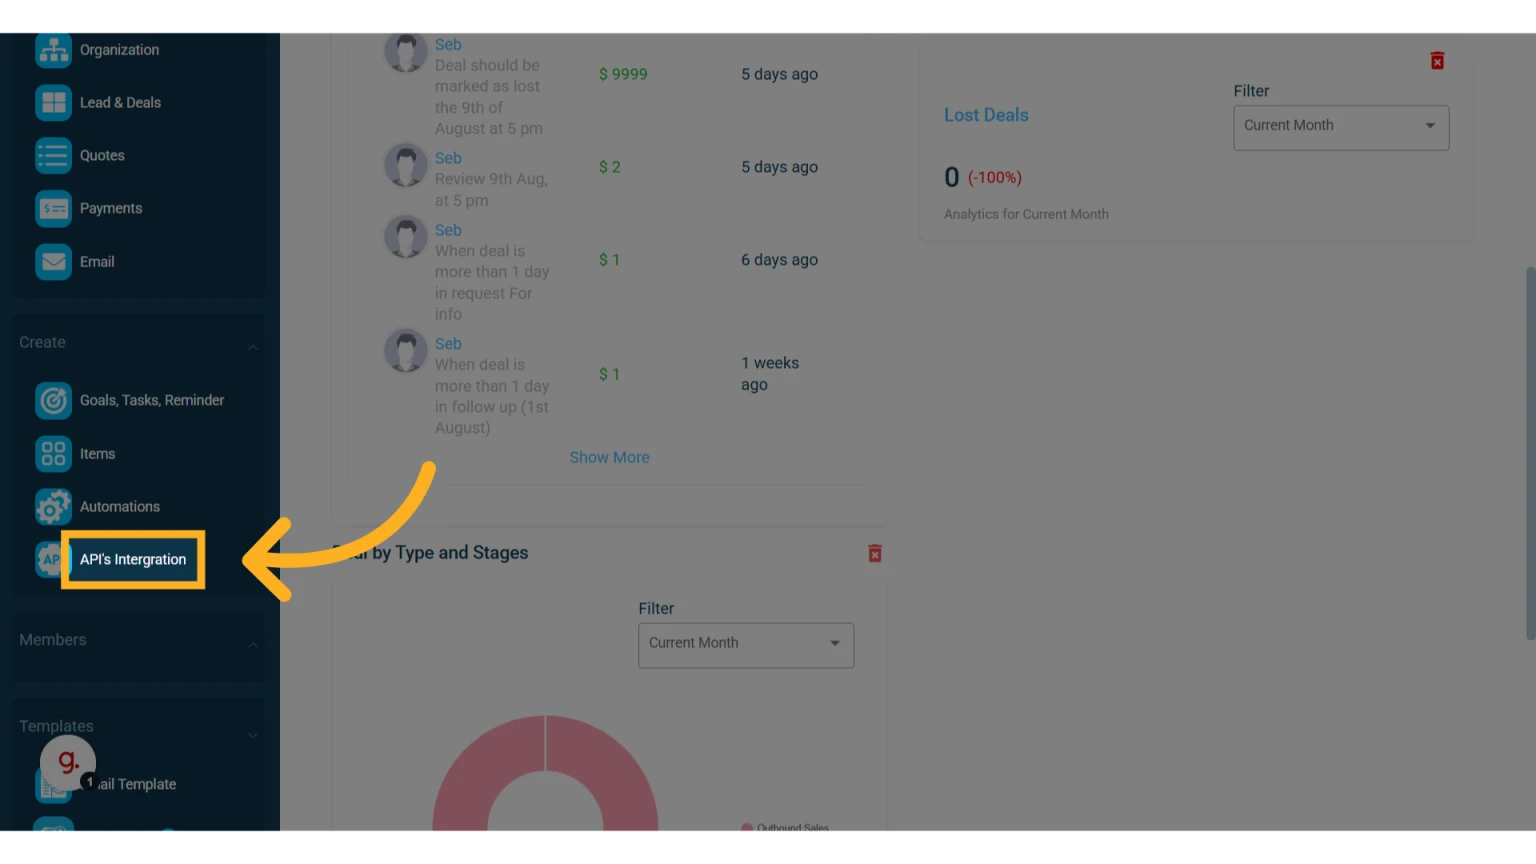
1. In the main left menu, click Create API Integrations
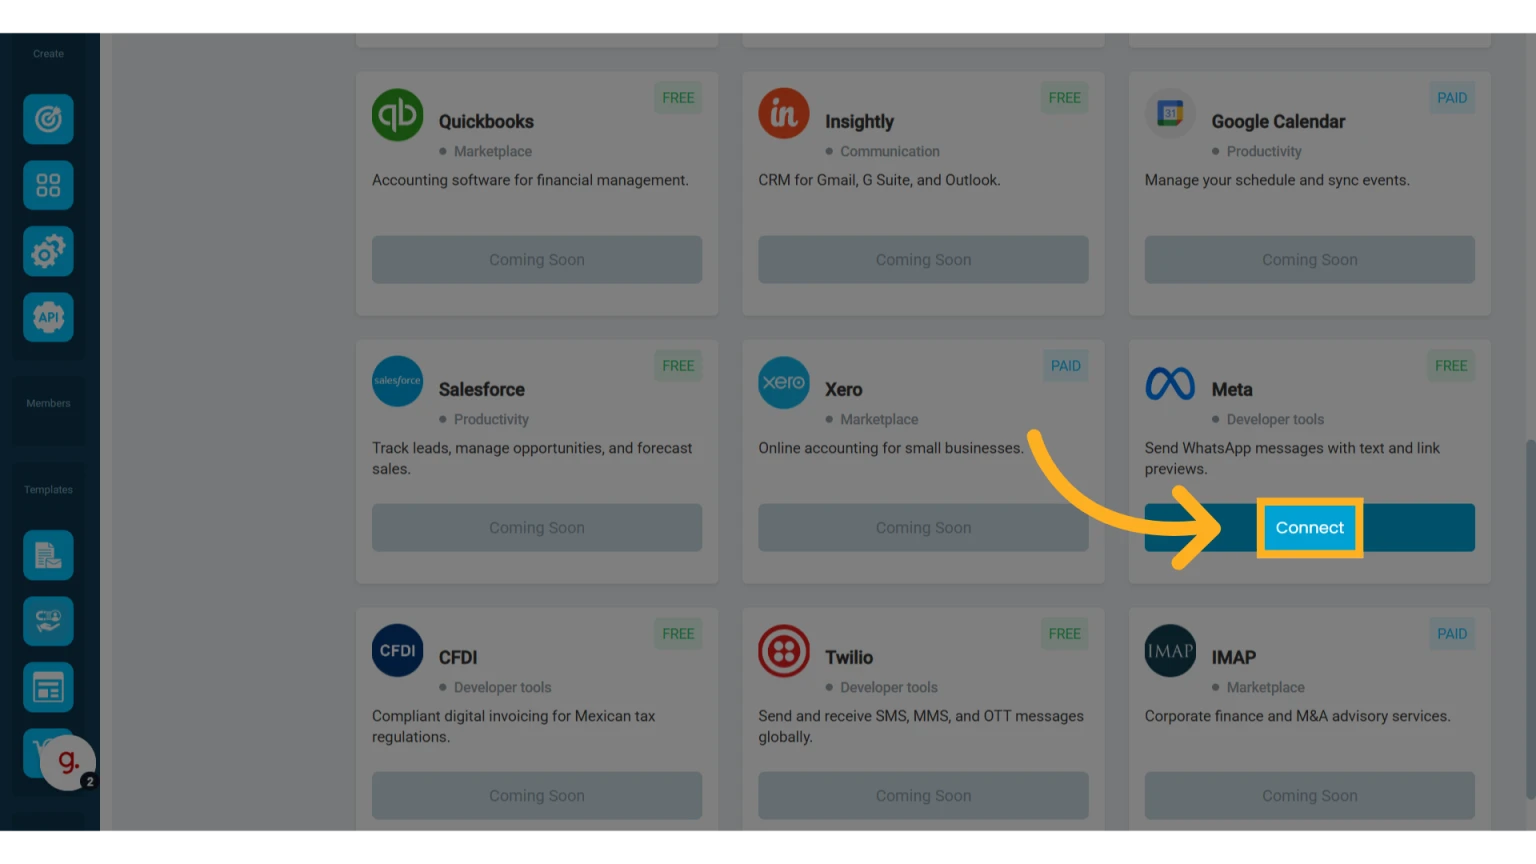
2. Look for the "Meta" integration and click "Connect"
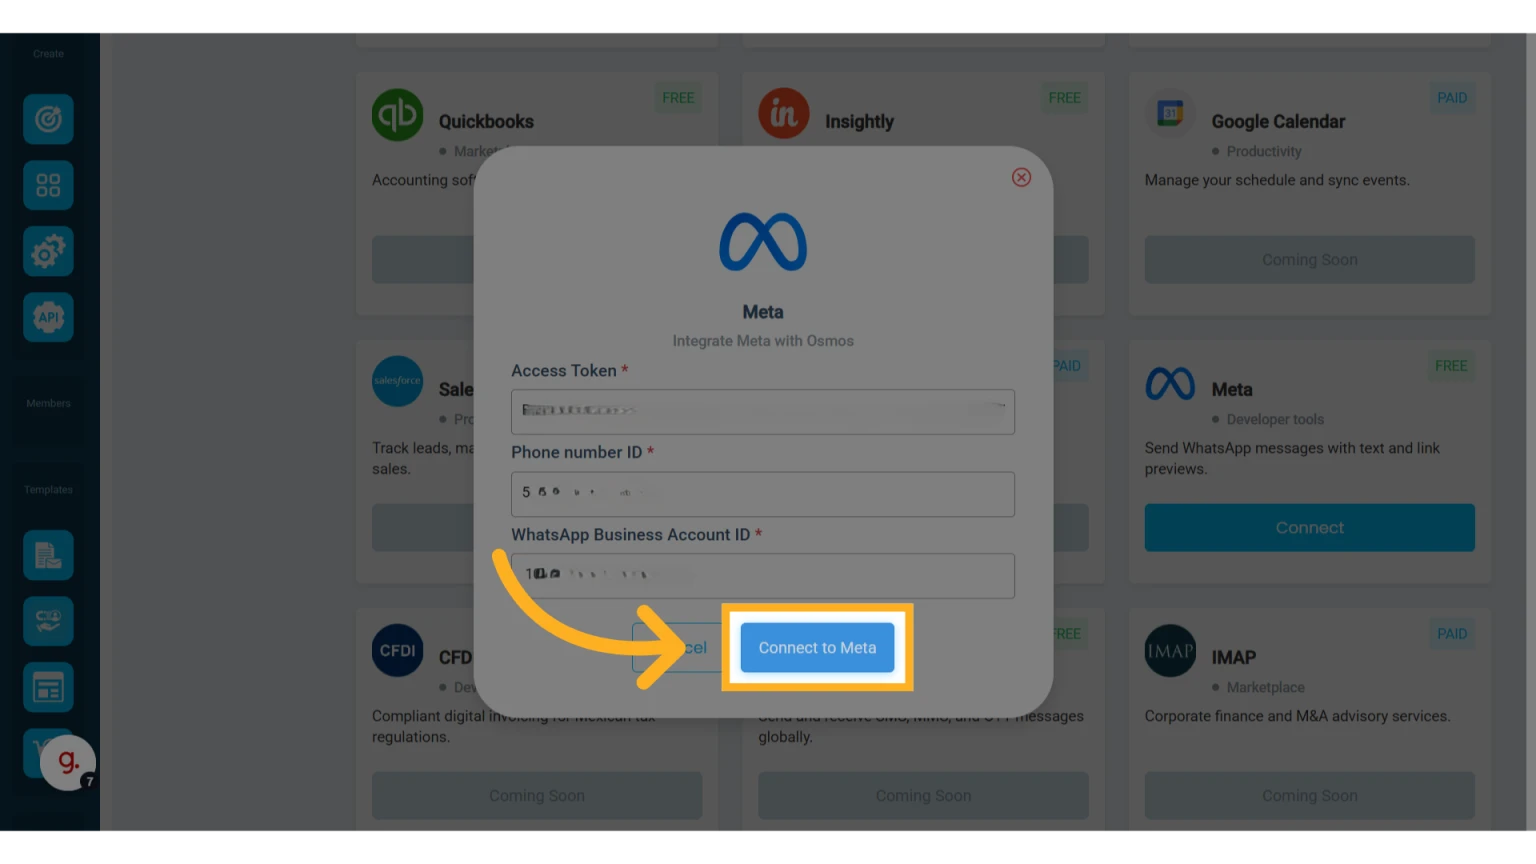
3. Enter the following information
Access Token
Phone number ID (Get it from Meta for Developers -> WhatsApp -> API Setup)
WhatsApp Business Account ID (Get it from Meta for Developers -> WhatsApp -> API Setup)
4. Click "Connect to Meta"
Send Quote Notifications to WhatsApp from the Quote Module
Once Meta is successfully connected to Osmos, you can start sending quote notifications to your contacts via WhatsApp.
1. Open an existing quote or create a new one
Learn how to create a quote.
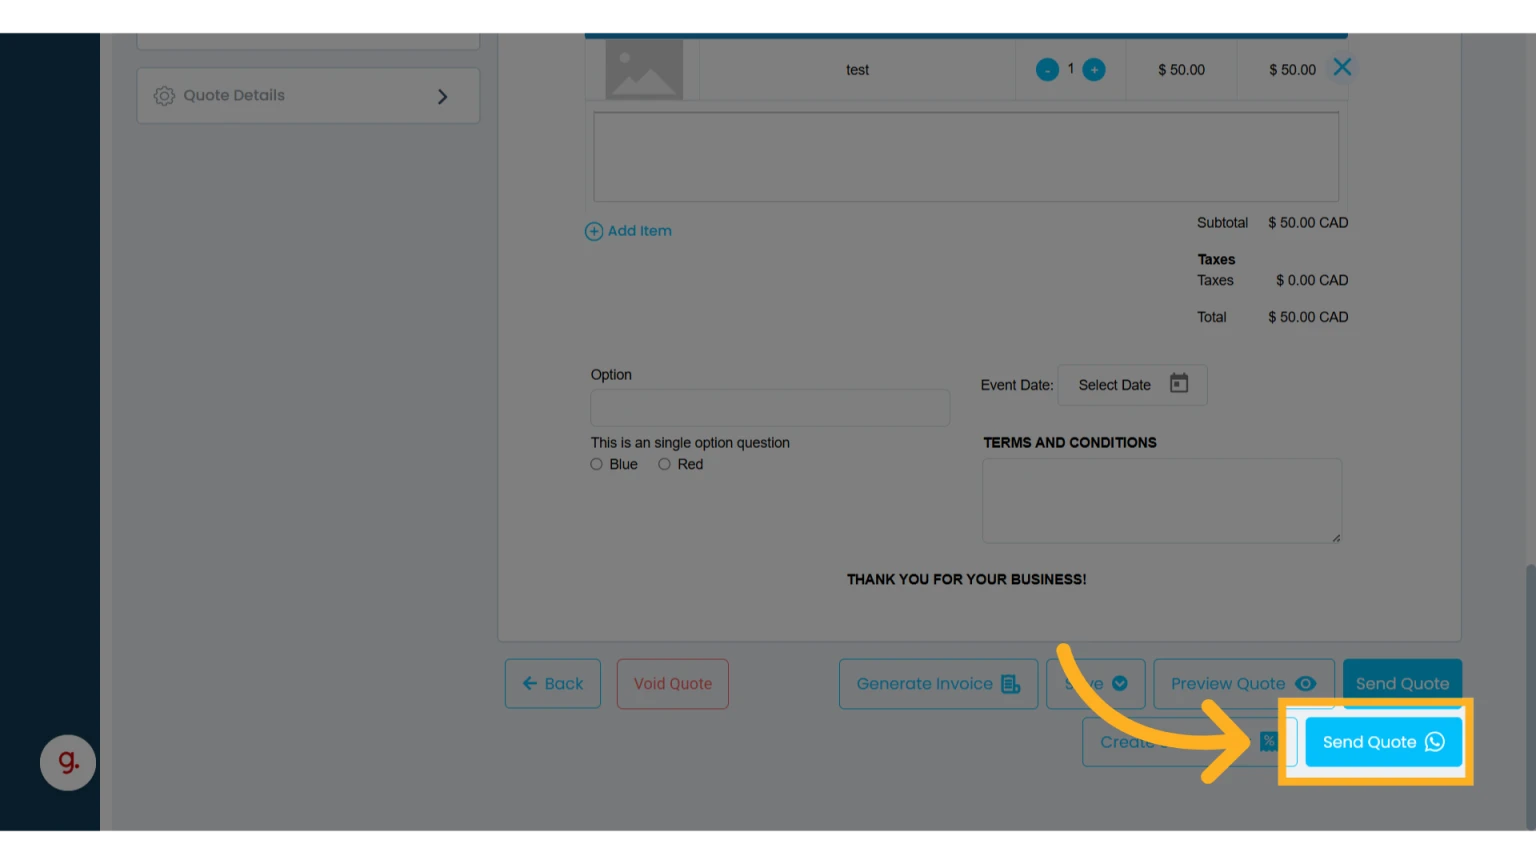
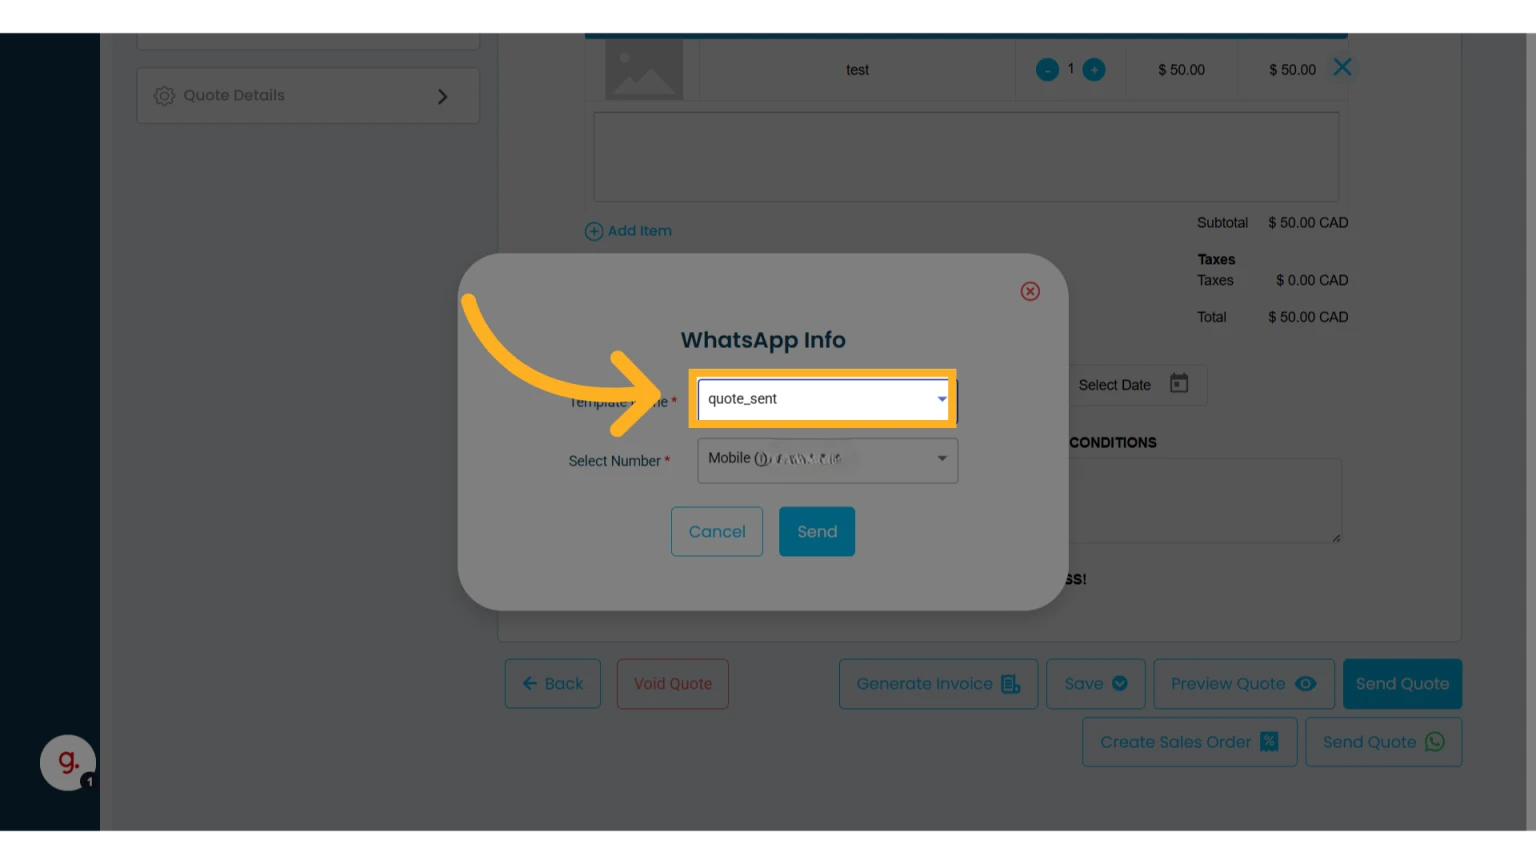
2. Click "Send Quote WhatsApp"
If your contact does not have a phone number, this option will not be available.
3. Select the WhatsApp message template you created
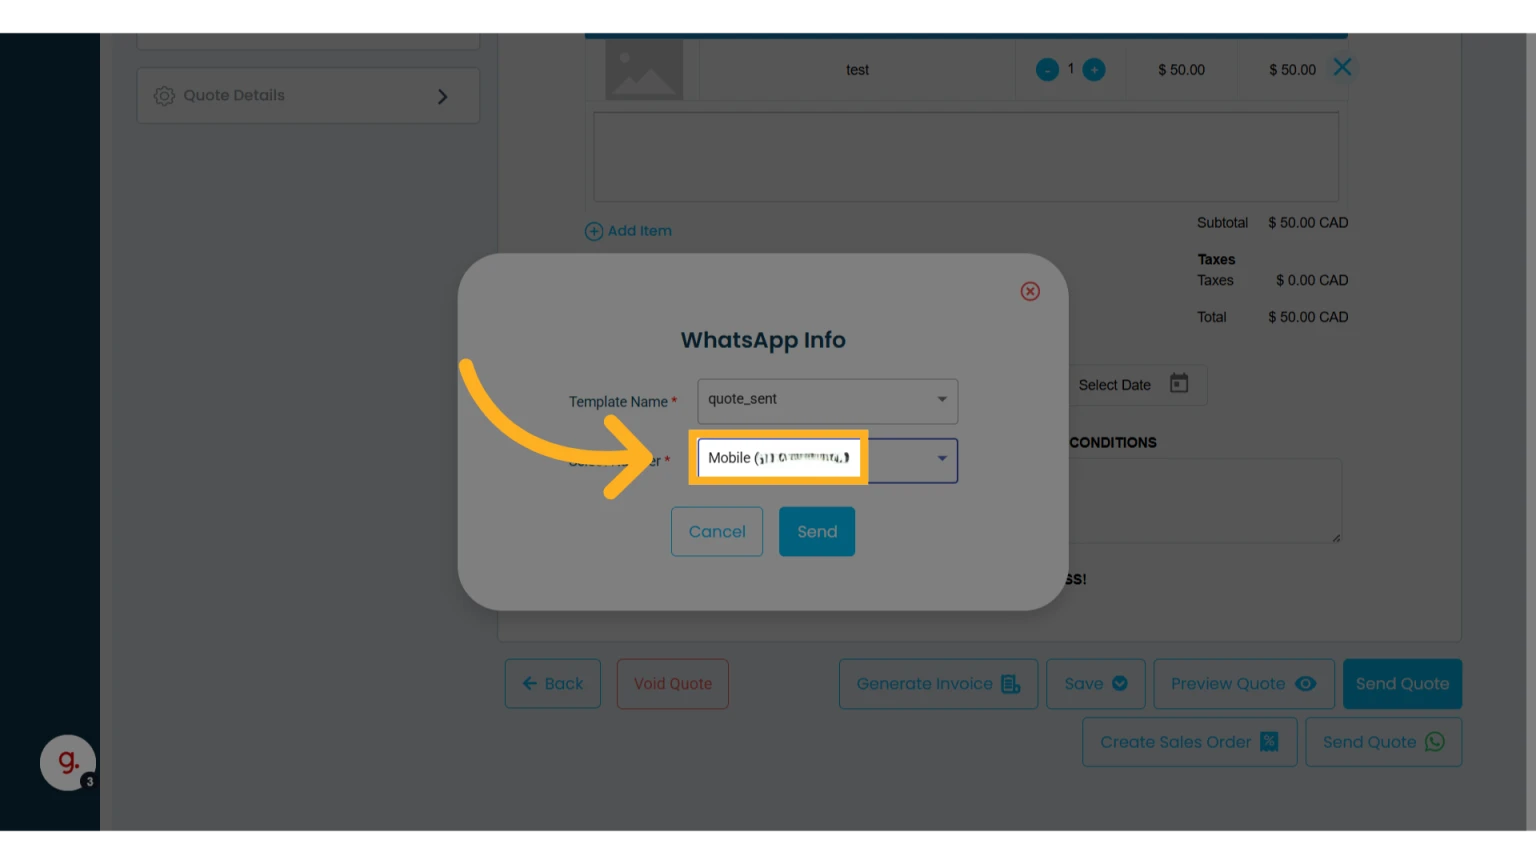
4. Select the phone number
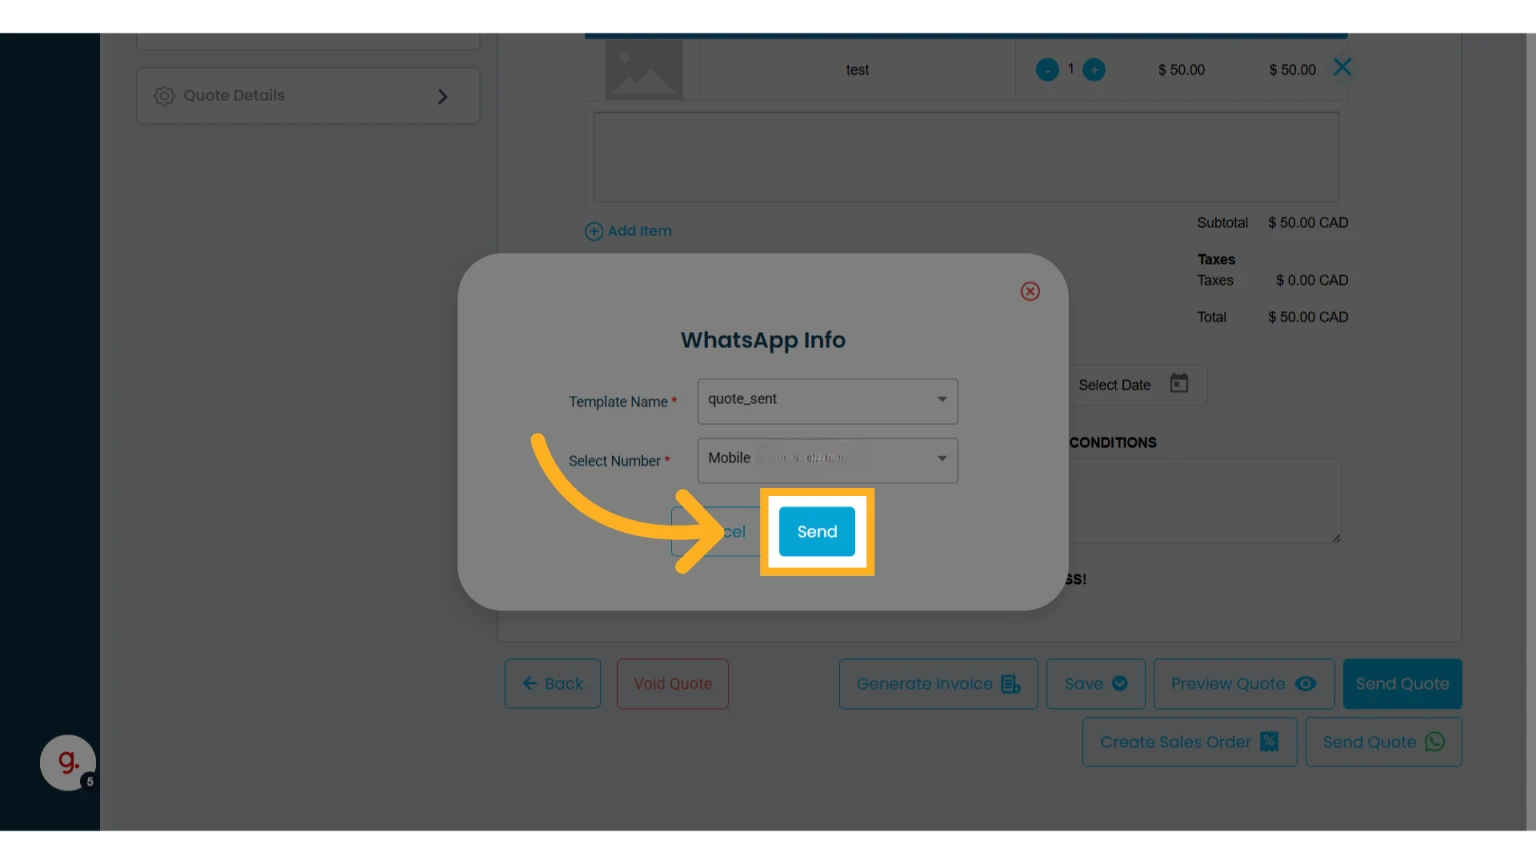
5. Click "Send"
NOTE: If your contact does not use WhatsApp, the notification will not be delivered. You can still send the notification by email.
Getting your WhatsApp information from Meta
This guide is designed to help you obtain the information needed to use WhatsApp in Osmos. However, we cannot guarantee that it is always up to date, as Meta may change the process at any time. We also cannot provide support for Meta’s setup process.
NOTE: The process is somewhat lengthy and confusing. We created this guide based on our own steps while adding a WhatsApp account to Osmos (August 2025).
Prerequisites (once)
A Meta Business account with admin access.
Create it by signing in with your personal Facebook account.
Provide your legal business information so Meta can verify your business for WhatsApp API use.
Verification requires legal documents such as a certificate of incorporation or tax registration.
A Meta app with the WhatsApp product added (Meta for Developers)
Create App in Meta
1. Sign in to Meta for Developers with your personal Facebook account
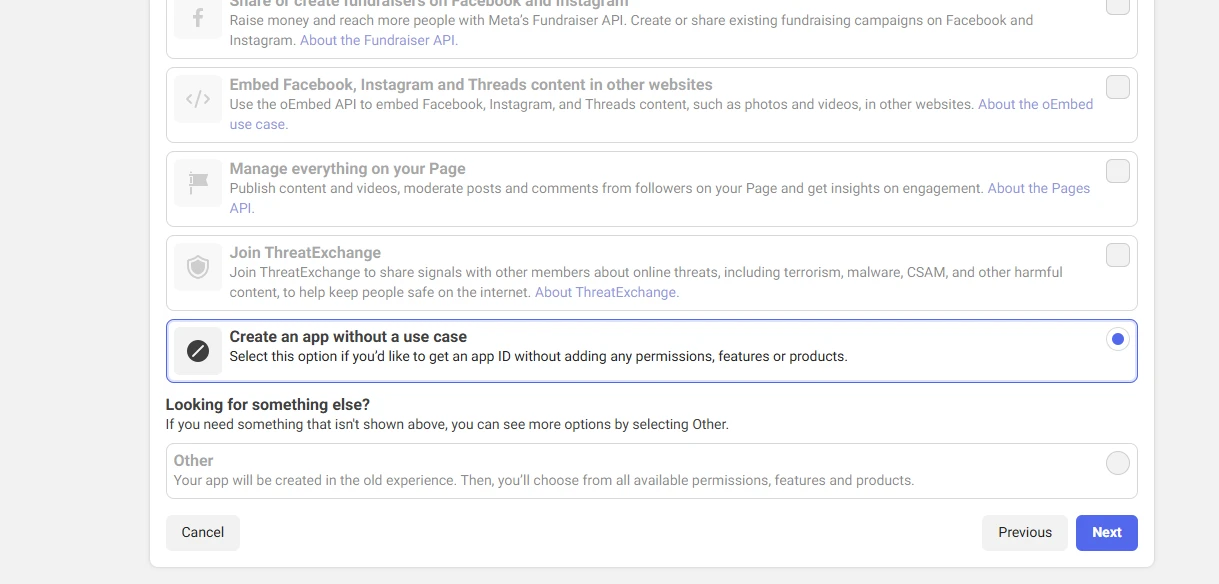
2. Create a new app
For Use Case, select Create an app without a use case.
For App Type, select Business or choose the business portfolio you want linked.
3. Add the WhatsApp product to your app
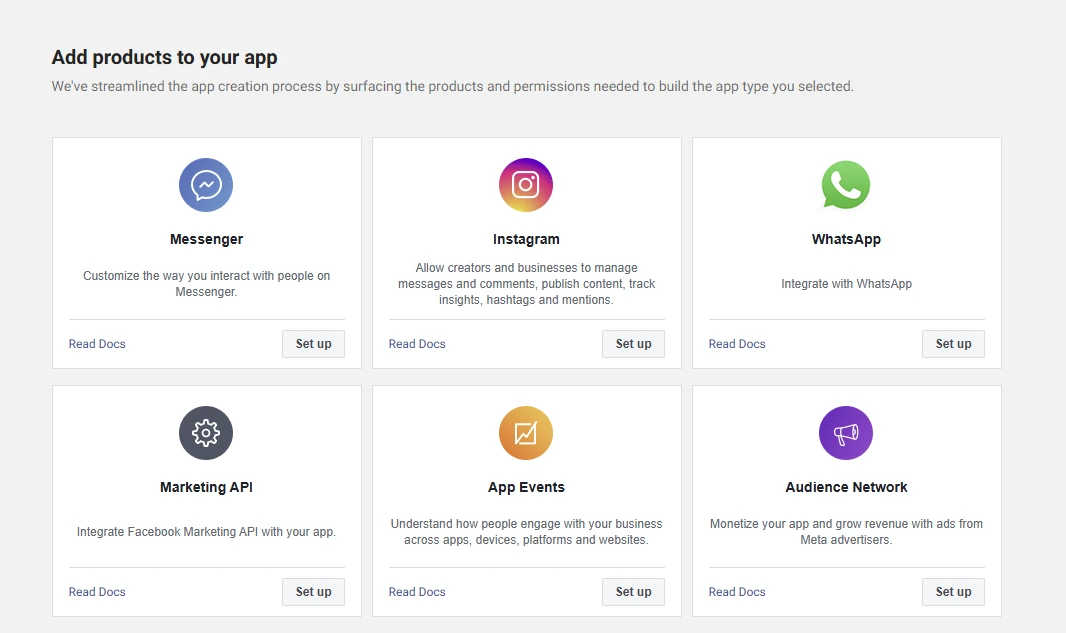
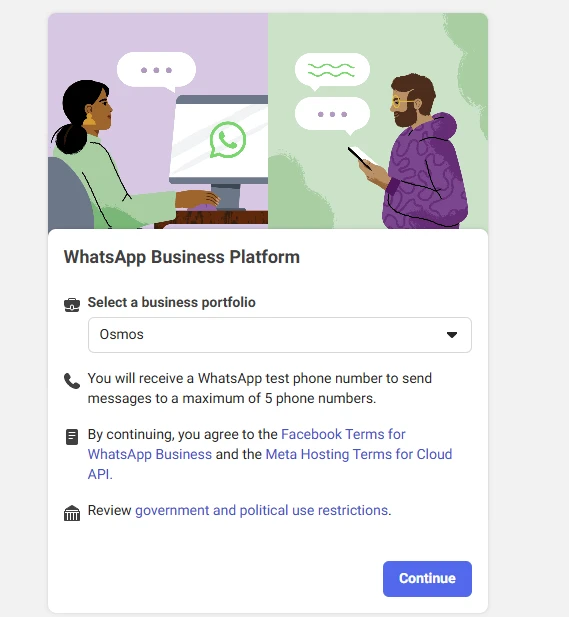
4. During setup, select your business portfolio. Meta will provide a test number and temporary token (for testing only)
5. Complete the API setup as requested
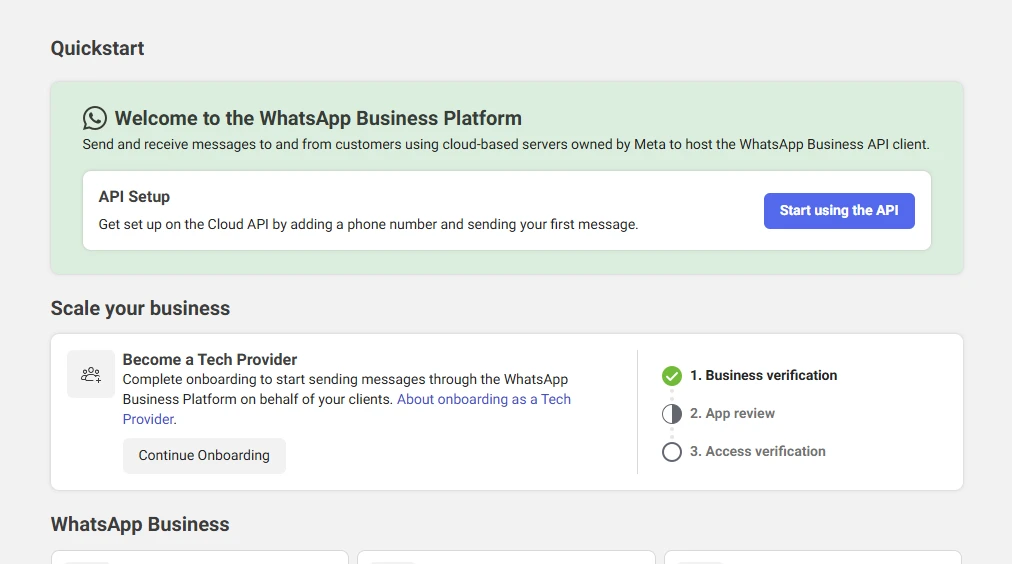
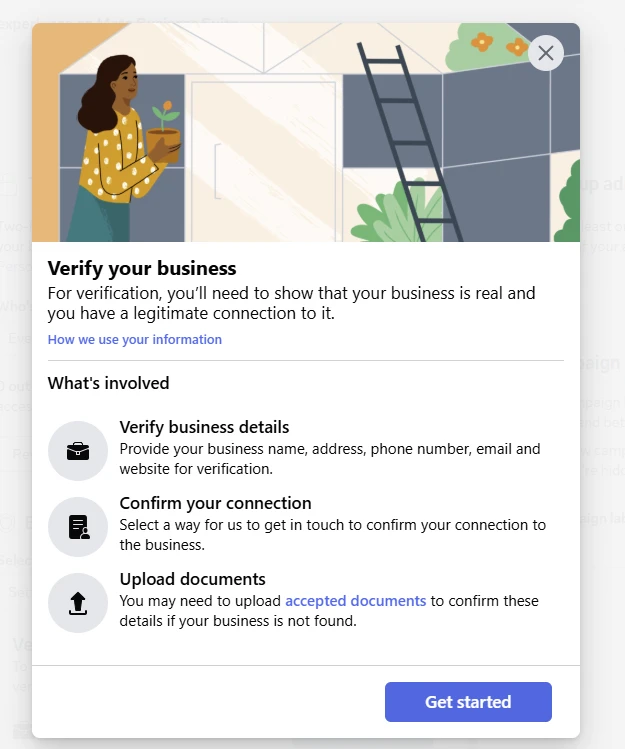
6. Once your WhatsApp account is added, click Start Verification to verify your business
7. Provide your business phone number, address, type of business, website, etc
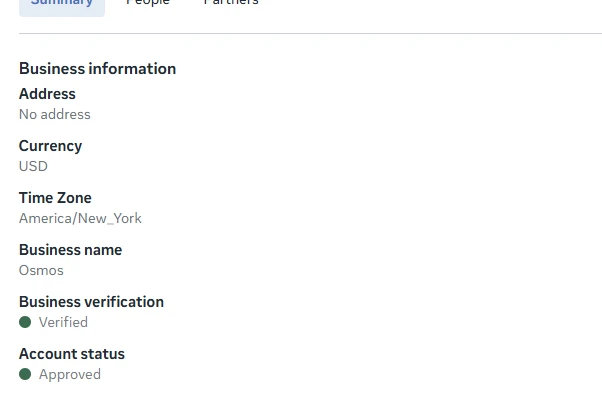
8. When your account status shows Verified and Approved, you can generate a permanent access token and add your business phone number
Adding your Business Phone Number in Meta
Open WhatApp Manager
In the left menu, go to Account tools → Phone numbers.
Click Add Phone Number.
Fill in:
Business Display Name → must match your business name or brand guidelines.
Timezone and Business Category (required for profile).
Enter your phone number in full E.164 format (e.g.,
+15145551234).
IMPORTANT: This number must not be linked to a personal WhatsApp account. If it is, you’ll have to delete that account or use another number.Choose SMS or Voice call to receive the verification code
Enter the 6-digit code to confirm ownership.
Once verified, the number will appear in your phone numbers list, and your app can use it to send messages.
Getting your Phone Number ID and WhatsApp Business Account ID
From here is where you will get the "Phone Number ID" and the "WhatsApp Business Account ID".
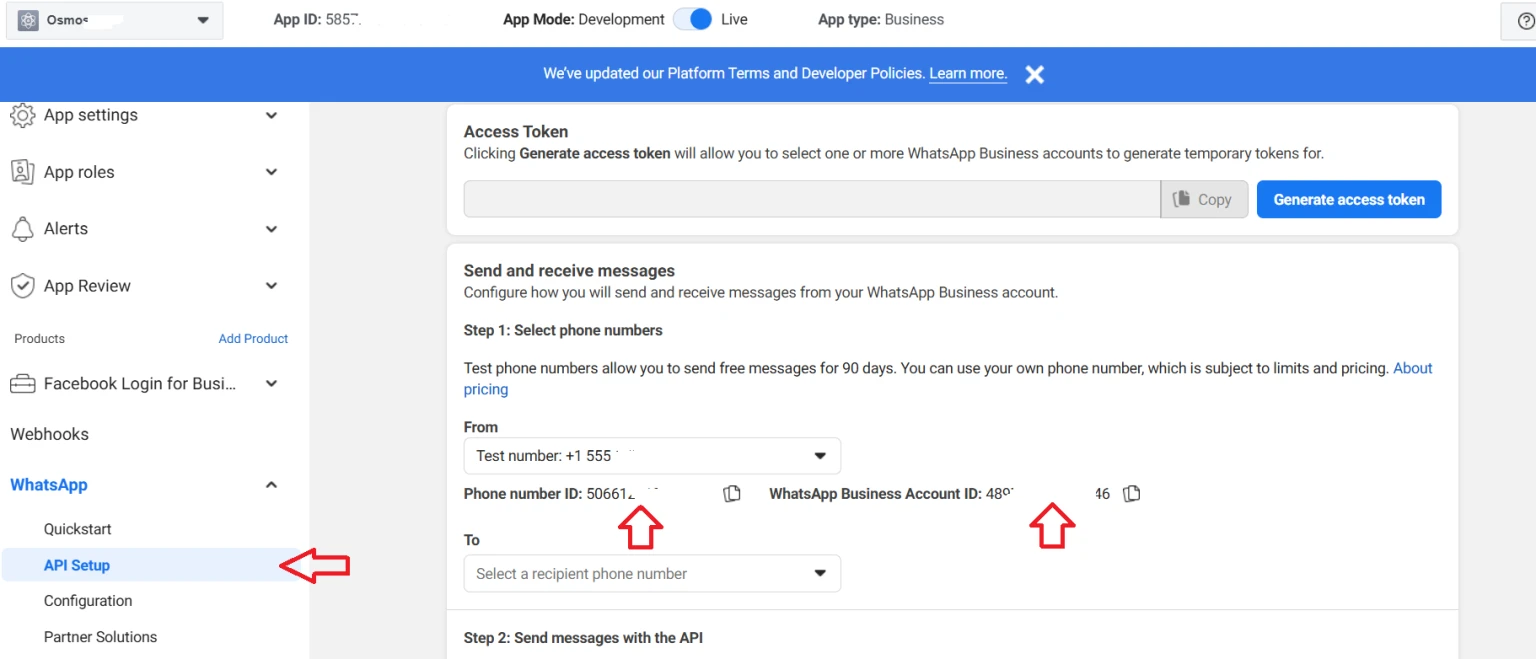
Go to Meta for Developers and select your app.
In the left menu, click WhatsApp → API Setup (or Getting Started).
Under From / Phone Number, you’ll see:
Your test number and business number. Select your business number and copy the Phone Number ID (this is required in Osmos).
The WhatsApp Business Account ID (copy this as well, ensuring you’ve selected your business number).
A Temporary Access Token (valid for 24 hours only). To continue, you’ll need to create a permanent production token.
Create a Permanent Access Token in Meta
To integrate Osmos with the WhatsApp API, you must generate a token that does not expire.
1. Open Meta Business Settings
Open Meta Business Settings.
Make sure you’re in the correct Meta Business Account.
2. Create a System User
In the left menu, go to Users → System Users.
Click Add.
Give it a name (e.g.,
WhatsAppAPI_User) and role (Admin is fine if it’s dedicated to API use).Click Create System User.
3. Assign Assets
Select your new System User.
Under Assigned Assets, click Add Assets.
Add:
Your App (the one with WhatsApp product).
Your WhatsApp Account.
For both, grant Full Control.
4. Generate the Permanent Token
In your System User page, click Generate New Token.
Select your App.
Check the following permissions:
whatsapp_business_messagingwhatsapp_business_management
Click Generate Token.
Copy the token and store it securely (Meta will only display it once).
This token is required in Osmos.
Create Your Quote Notification Template in Meta
To send WhatsApp notifications from Osmos when a quote is sent, you need to create a Message Template.
1. Go to WhatsApp Manager
Open WhatsApp Manager.
Make sure you’re in the right WhatsApp Business Account (WABA).
2. Open the Message Templates Section
In the left menu, go to Message Templates → Manage Templates and click on "Create Templates"
3. Choose Template Details
Category Marketing → Default
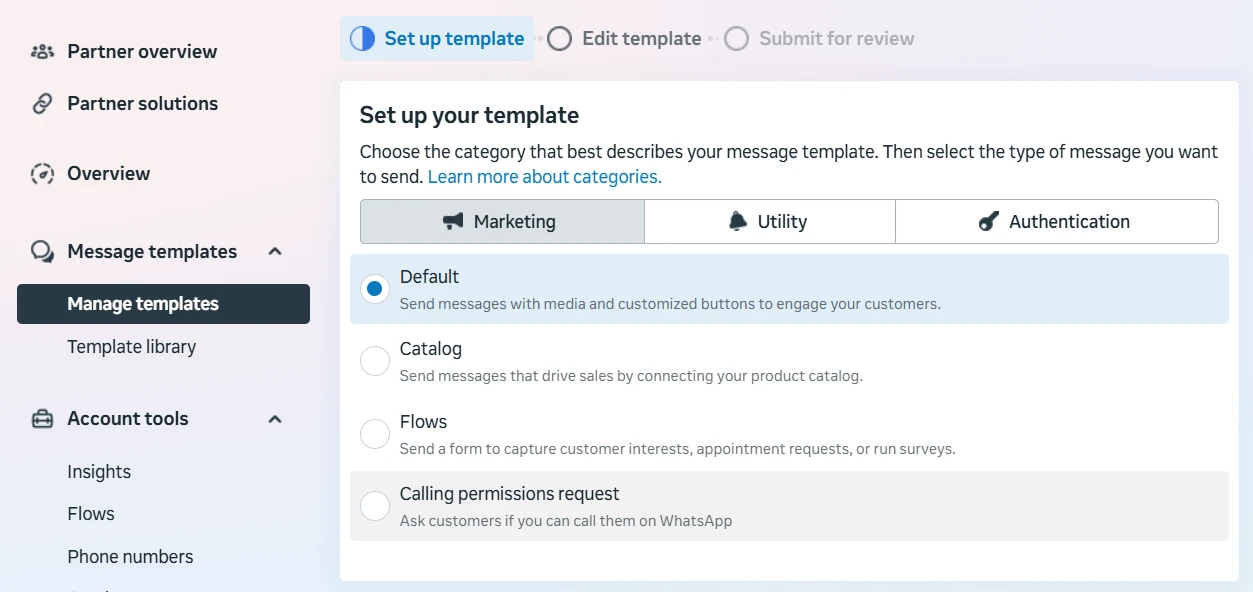
Name → lowercase letters, numbers, and underscores only (e.g., quote_template).
Language → choose the language you’ll send it in (you can create variations later).
4. Write the Template
Follow these steps carefully. Do not add unsupported media or formatting.
Your template should look something like this:
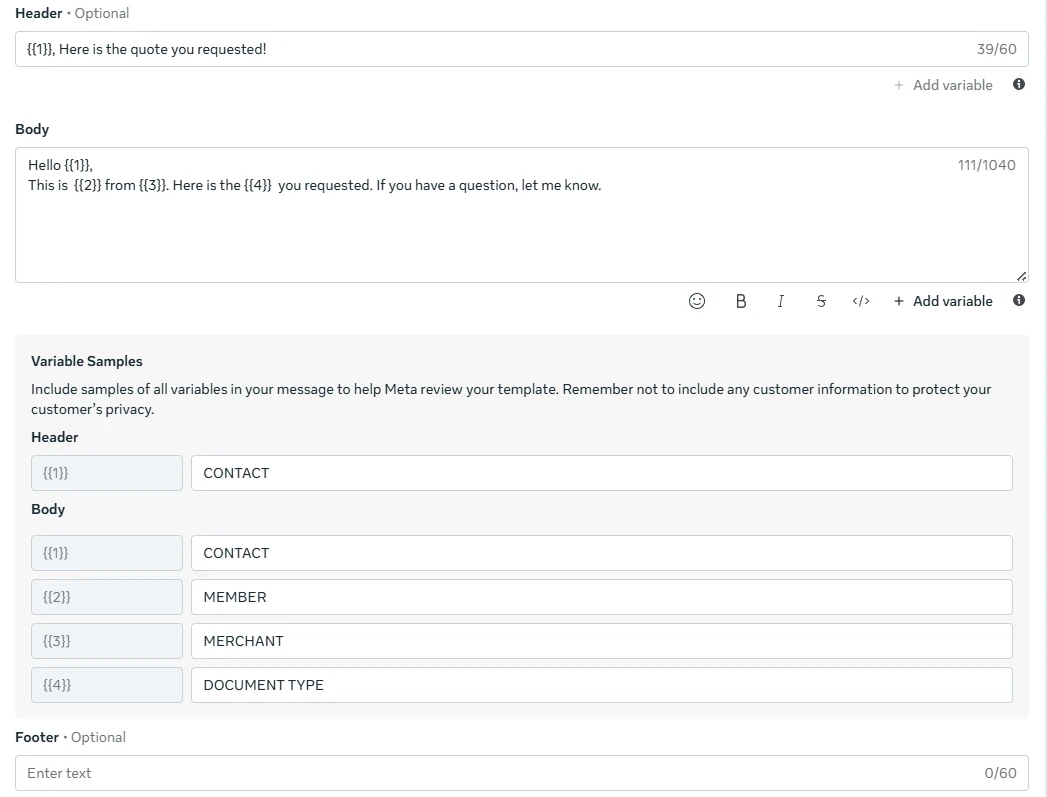
Header
{{1}}, here is the quote you requested!
Available variable:
{{1}} Contact Name
Body → main message text.
Hello {{1}},
This is {{2}} from {{3}}.
Here is the {{4}} you requested. If you have a question, let me know.
Variables:
{{1}}Contact Name{{2}}Member Name{{3}}Merchant/Business Name{{4}}Document Type (quote, invoice, sales order)
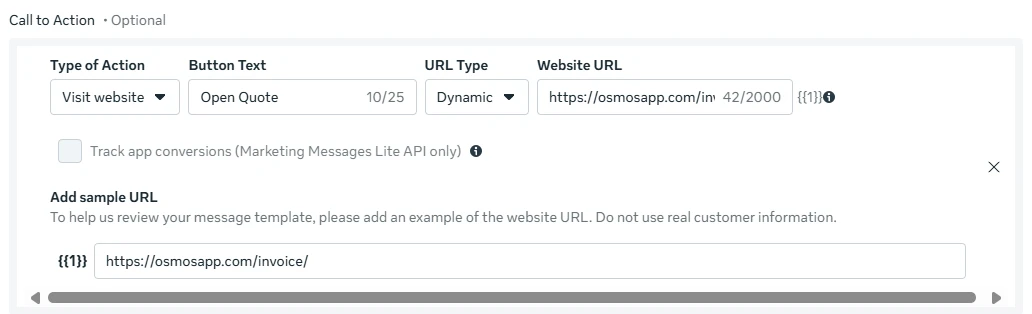
Button →
Type of Action: Visit Website
Button Text: Open Quote
URL Type: Dynamic
Website URL: https://osmosapp.com/invoice/{{1}} (Copy-and-paste this exact URL)
Add sample URL: https://osmosapp.com/invoice/
5. Submit for Approval
Click Submit.
Meta usually approves templates in minutes to a few hours.
Status will show as Approved before you can use it.