
In this guide, we will show you how to update items in bulk. This is useful when you want to modify multiple items at once.
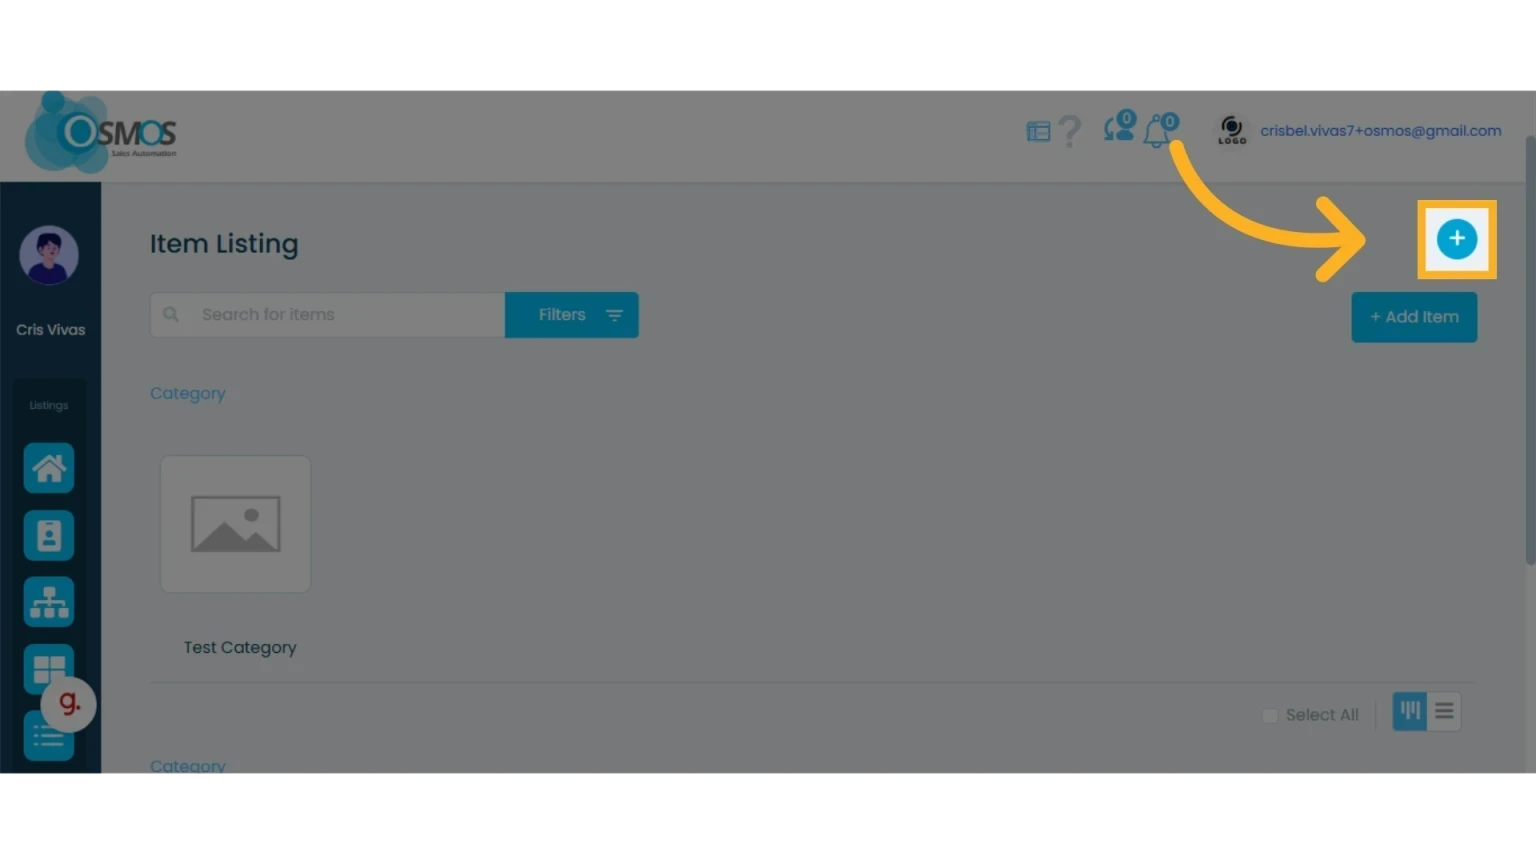
1. Click the “+” icon and select “Download”
This will download your item catalog.
2. Open the CSV file and update the information
IMPORTANT: Do not delete the item ID (the first column). Doing so will duplicate the items instead of updating them.
Follow these tips to complete the template:
Do not delete or modify the value in the first column labeled “Id”
If you want to deactivate the item, replace the value “FALSE” with “TRUE”
Update the fields you wish to modify
To apply multiple discounts or taxes, separate the values with a comma ','. For example, entering ‘5,10’ will add a 5% and a 10% discount. The same applies to tax names—use commas to separate them.
If you have added custom fields, create a new column with the name of the field and assign values according to the existing options. Keep in mind that if you enter a value that does not match an existing option, the field will remain empty. This rule applies to all Field Types, except for text input.
If you want to add new items, leave the first column empty.
3. Upload the CSV file with the updated items
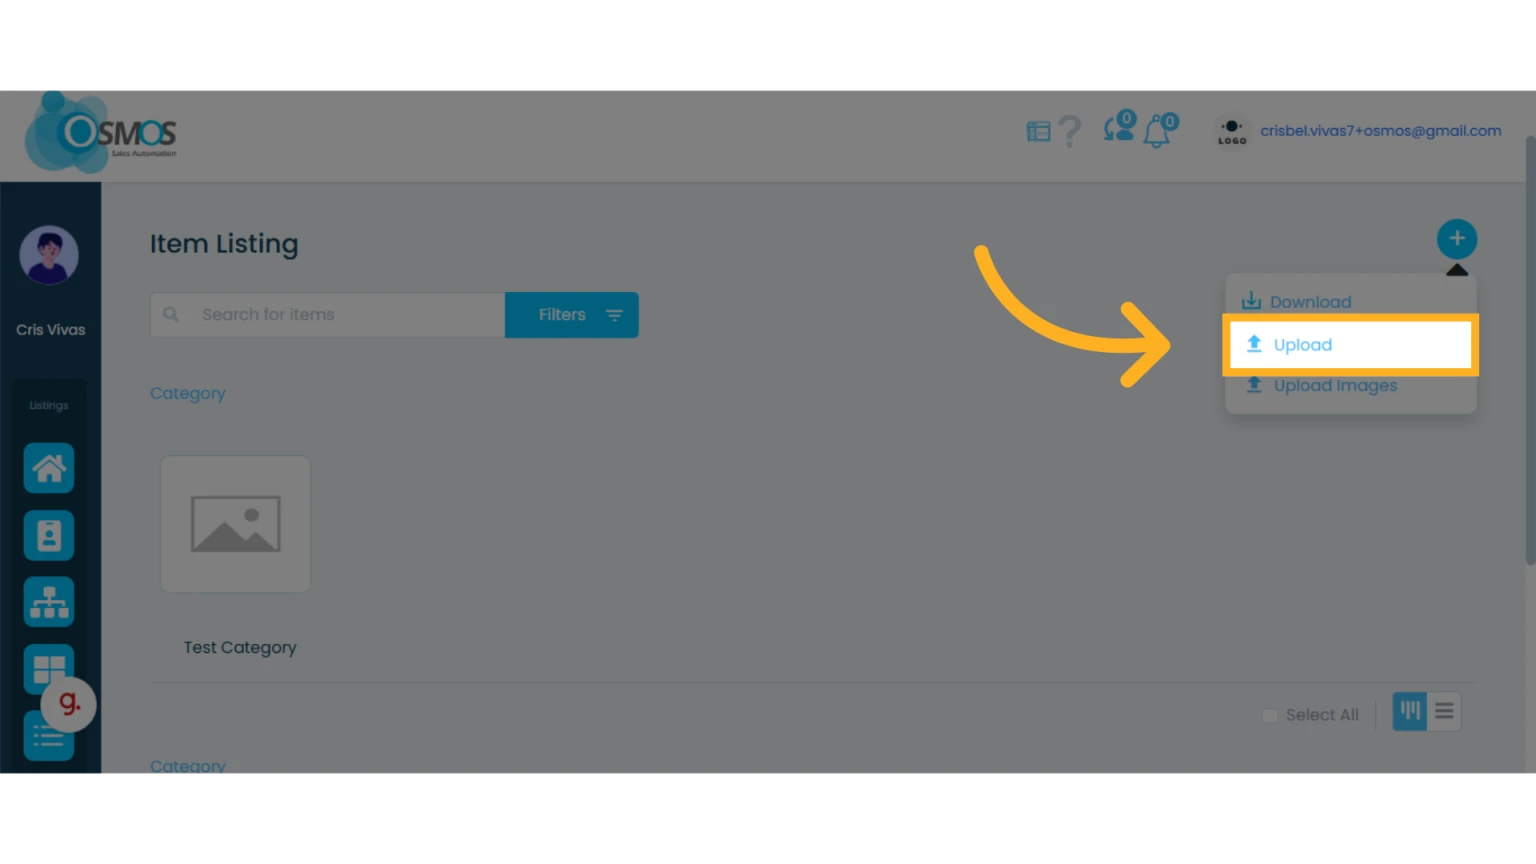
Once your document is ready, upload it from your computer. Then, follow the same steps you use for bulk uploading items.
Learn how to upload items in bulk.
4. Match the column headers with the available fields in your Osmos workspace
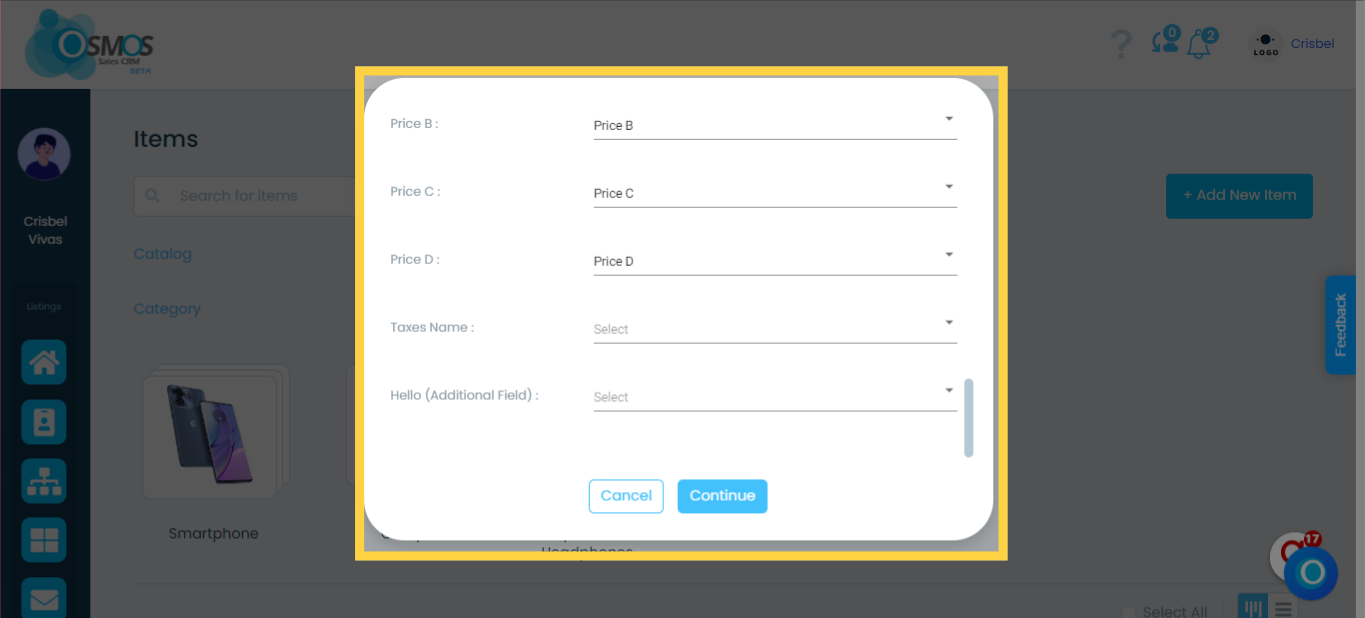
To ensure that the fields in your file are saved in the correct place in your workspace, follow these steps:
From the dropdown list, match the Osmos field (on the left) with the corresponding column from your file (on the right).
For example, if your file has a column called “Name”, you can match it with the “Item Name” field in Osmos.
NOTE: If you leave a match empty, that field will not contain any data in Osmos.
Osmos will automatically match the column headers to the available fields in the platform, as long as they match exactly.
If any field is not matched correctly or does not have a direct equivalent, you can assign it manually by selecting the appropriate field in your workspace. For example, if your file includes a column titled “item”, you can specify that its data be saved under “Item Name” in Osmos.
Any title in your document that does not have a corresponding field in Osmos will remain unassigned.
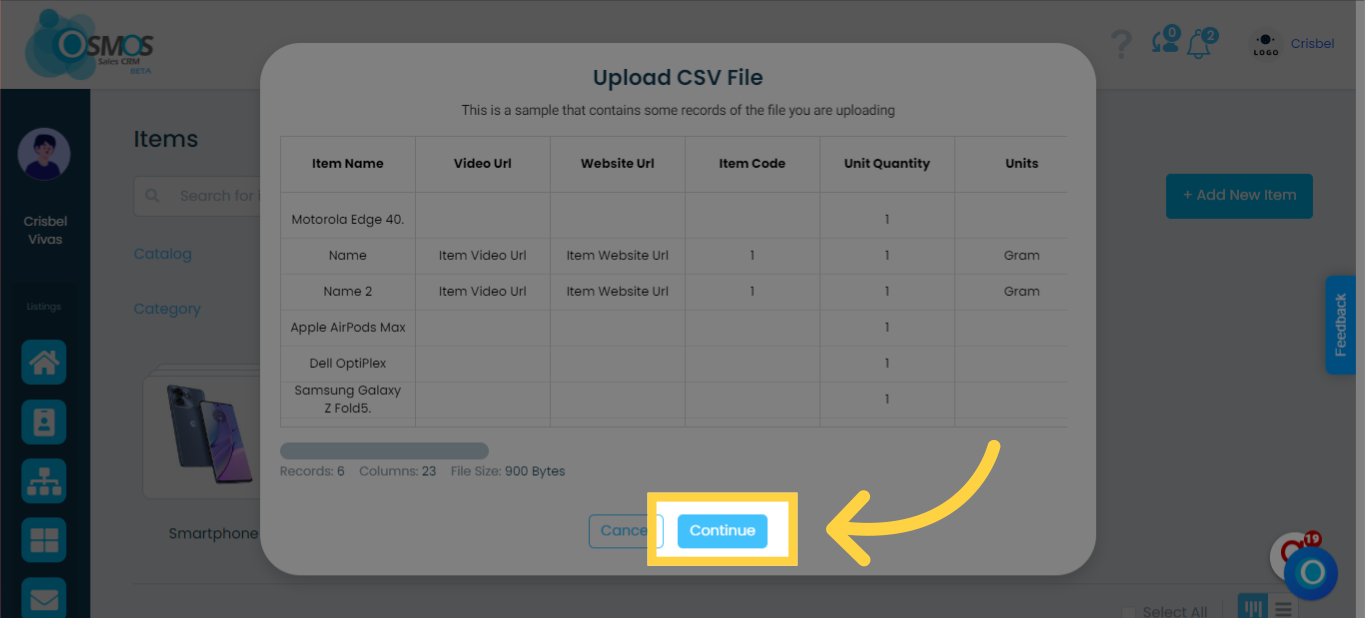
5. CSV File Confirmation
A sample of the items will be shown. Verify that the column headers in your file match the correct field data.
Click “Continue.”
6. Add a tag
You can assign a tag to identify the items you are uploading. To proceed, check the box to confirm you understand that the file upload may take a few minutes to complete.
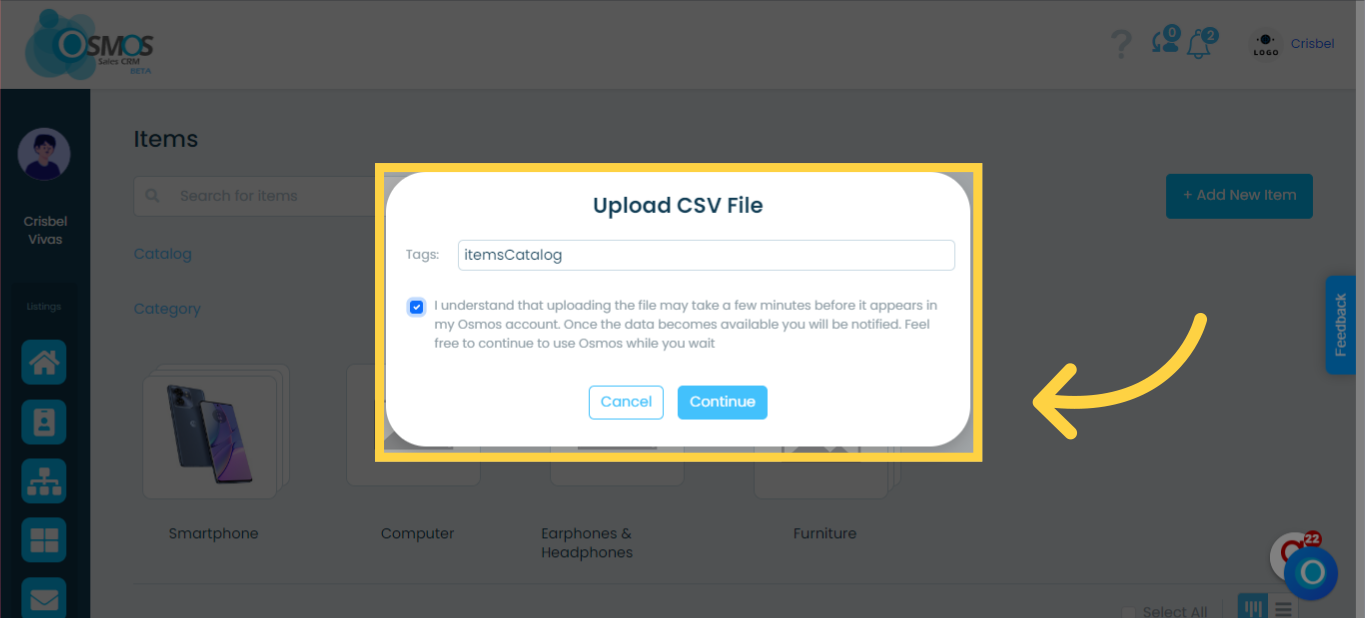
Click "Continue".