
To upload a list of contacts to Osmos via a csv file follow this steps
1. Click on "Contact" in the main left menu

2. Click the "+" sign in the contact list, located at the top right

3. Click on the "Upload CSV" option

4. Click on "My Computer" to select the file to upload

5. Match the data between Osmos and your file
To ensure that the fields from your file are correctly saved within your workspace, follow these steps:
From the dropdown list, match the Osmos field (on the left) with the corresponding field from your file (on the right).
For example, if your file has a column named "Customer Name," you can match it with Osmos' "Name" column.
NOTE: If you leave a field mapping blank, that field will not contain any information in Osmos.

TIP: You can download the "Osmos sample file." Use this file to ensure you have all the desired columns and that they match automatically.

IMPORTANT: If you added custom fields in Osmos, it is important that the values in your file and the ones you created in Osmos are IDENTICAL.
For example, if the value of the custom field inside Osmos is written as “Mr.” and in your file it is written as “sr.”, this field will be omitted and will appear as empty, since they are not written in the same way.
6. Click "Continue"

7. Review the sample
A preview of the contacts will appear. Verify that the column headers in your file match the corresponding field information.

8. Click "Continue"

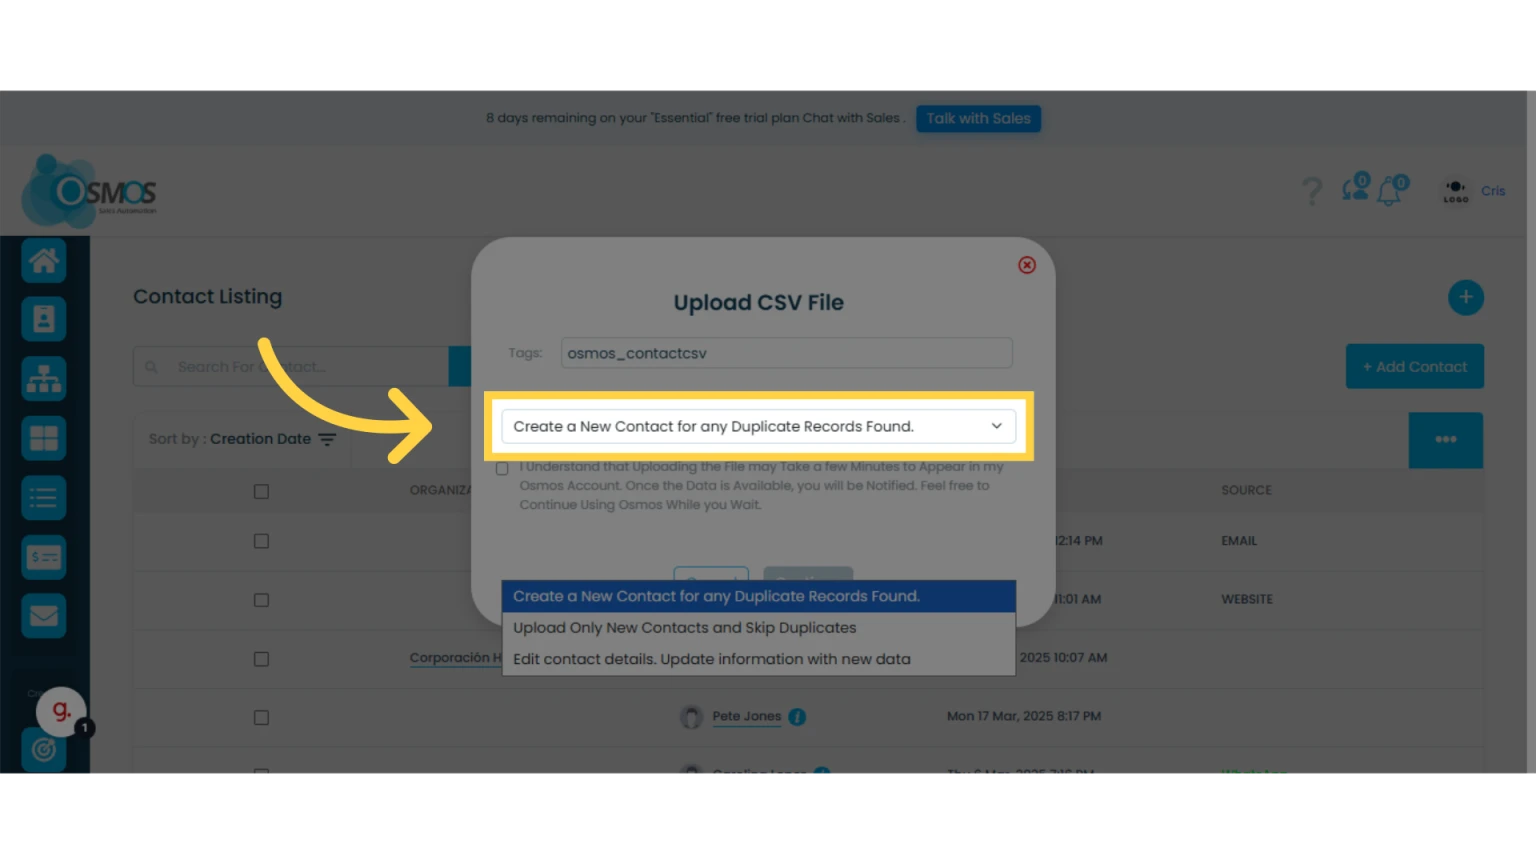
9. Confirm the file upload, select an action, and click "Continue"
You can add a label name to your file and choose one of the following options:
A) Create a new contact for any duplicated records found: This option will create a record for each entry in the file without checking for duplicates.
B) Upload only new contacts and skip duplicates: This option will only upload new contacts and skip duplicates by checking the email field. The only way to check for duplicate contacts is through the email address.
C) Edit contact details. Update information with new data: This option is ideal if you want to update contact information. It compares and updates data by overwriting it.
IMPORTANT: Make sure your uploaded file contains all the data you need to update. If a field appears empty in your file, that field will be deleted in Osmos and will appear blank.
10. Click "Done"
Your file will not be uploaded immediately; instead, it will be added to a queue for processing. You will receive a notification via email and through the notification bell once the contacts have been successfully uploaded. Please note that this process may take a few minutes to complete.
